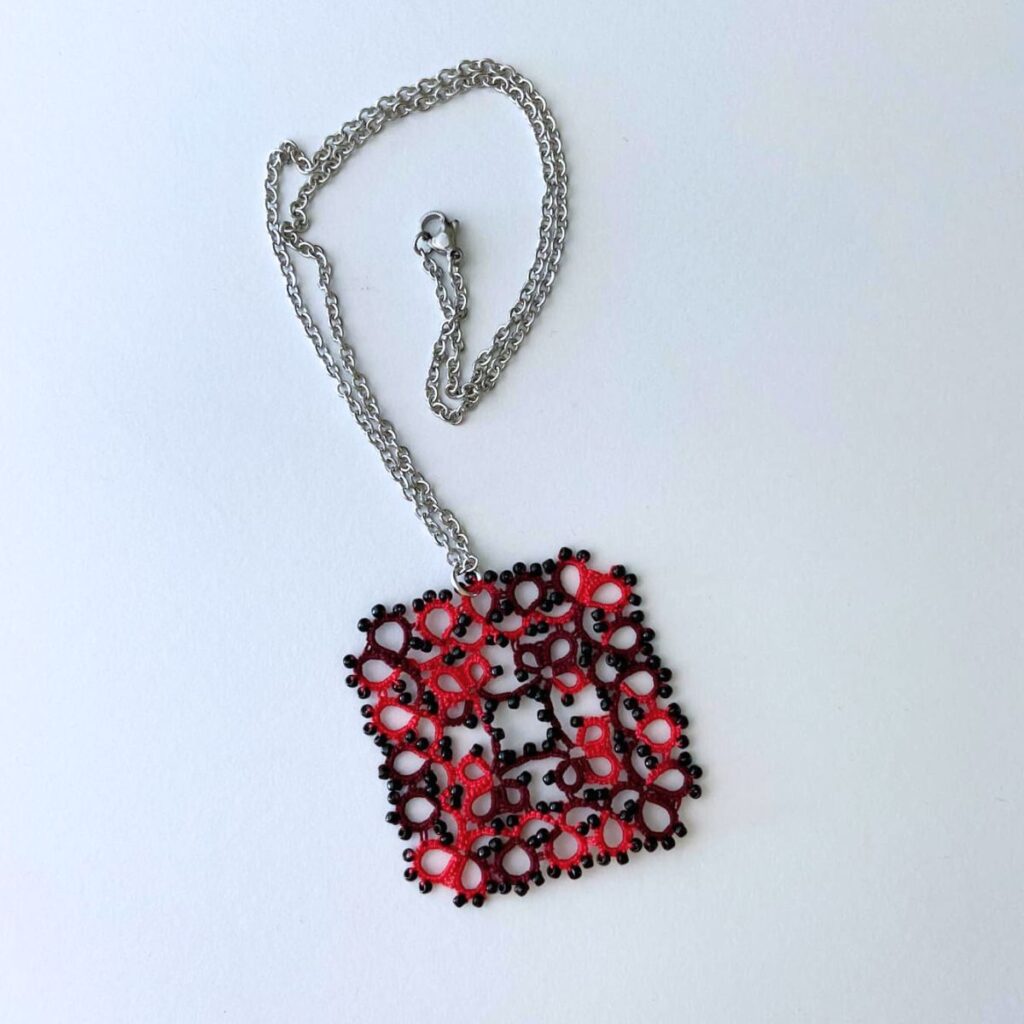
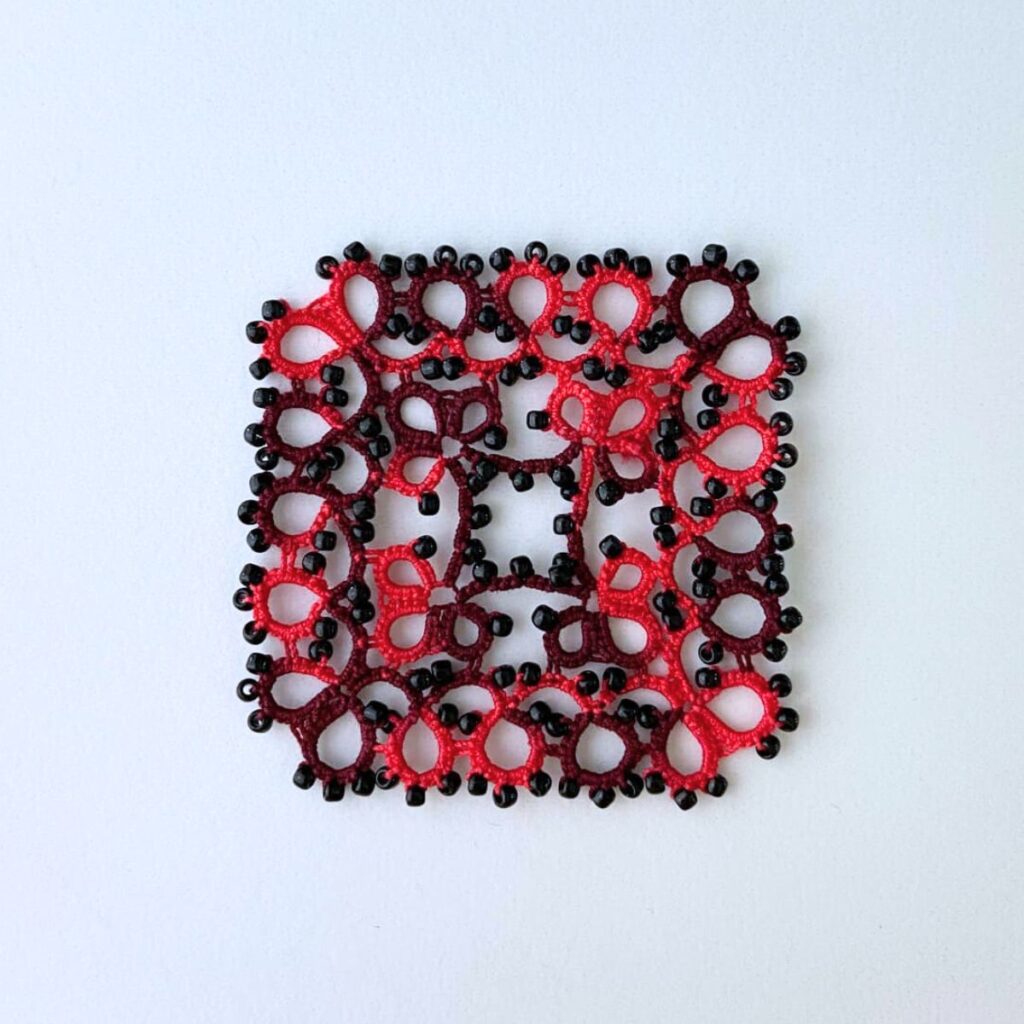
Here is my new free tatting pattern. This is a beaded necklace pendant tatting pattern.
Tatting makes really elegant looking jewelry, especially if you use smaller thread. This necklace pendant is made with Lizbeth thread and seed beads.
Lizbeth thread comes in many different colors, solid colors and multi-colored. I used multi-colored Lizbeth thread for this pendant and the color of the thread is called “Red Burst”.
Tatting is one of my favorite crafts and tatting has been around for centuries. Usually with tatting you hear a lot about lace edgings and doilies, but you can also make jewelry, ornaments and more.
This is a beaded pendant tatting pattern, so I would call this a intermediate tatting pattern because it uses seed beads.
You can also make this necklace pendant without the beads and just have regular picots where the beads would go instead.
Save this free tatting pattern on your Pinterest for later Here.
* This Post may contain affiliate links.*
Tatting Supplies
- Size 40 Lizbeth Thread.
- Size 11 Seed Beads.
- Tatting Shuttle or Tatting Needle.
- 6mm Jump Ring
- Necklace Chain.
- Jewelry Pliers.
- Small Crochet Hook (optional).
- You can also purchase the ad-free PDF pattern on my Etsy shop Here.
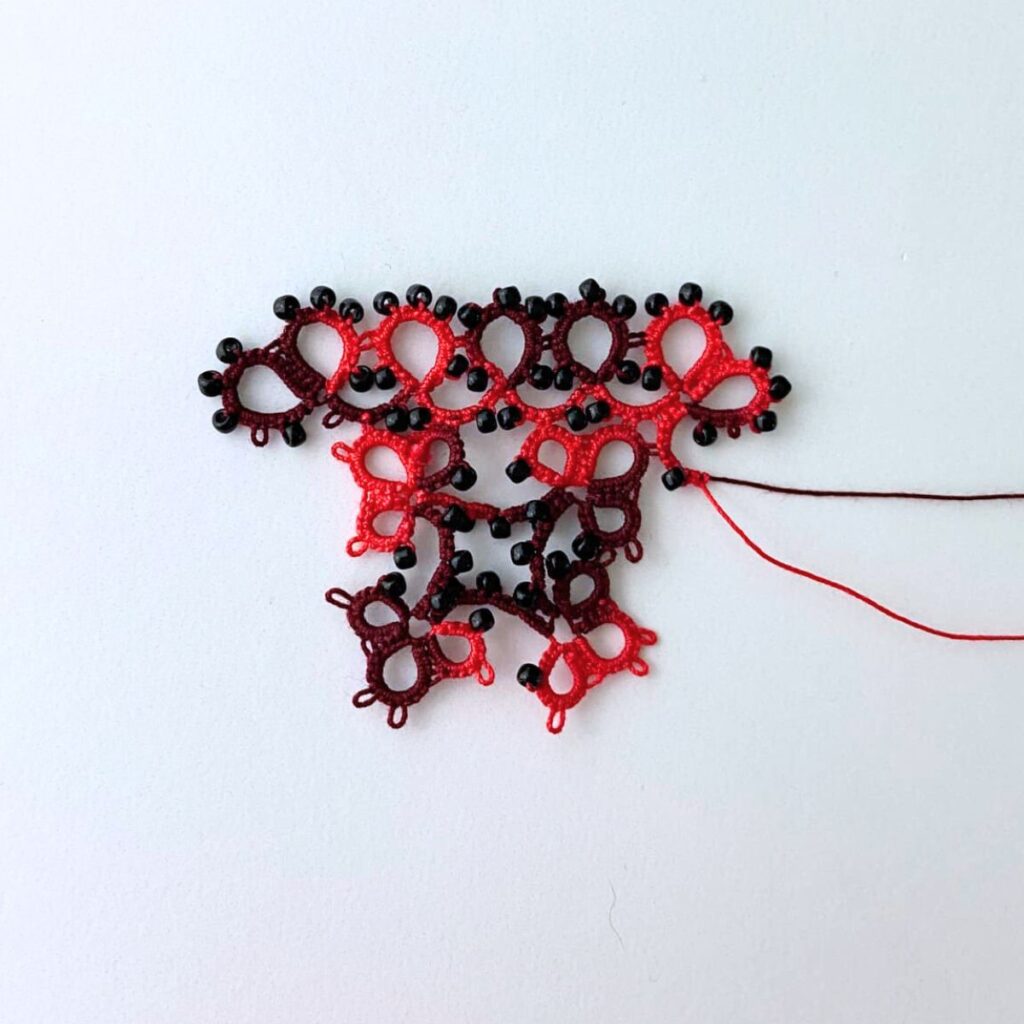
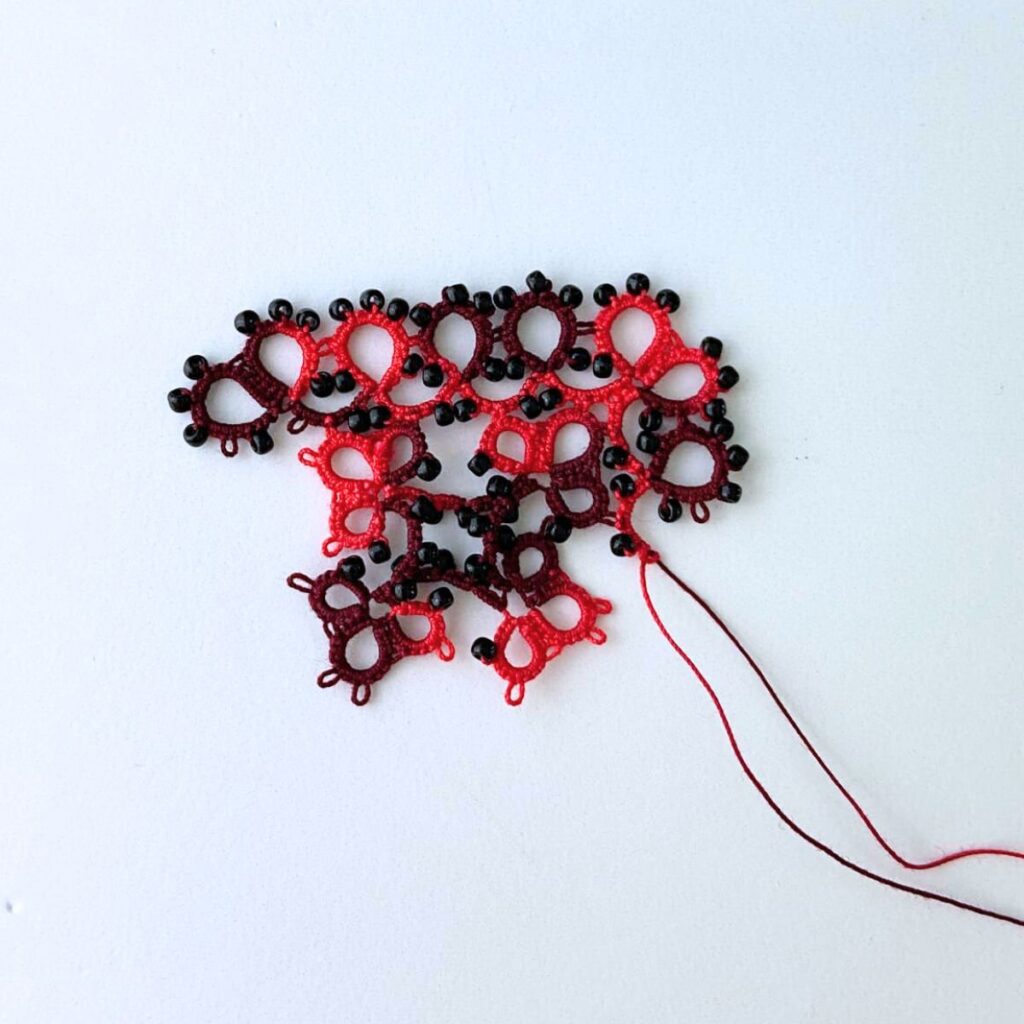
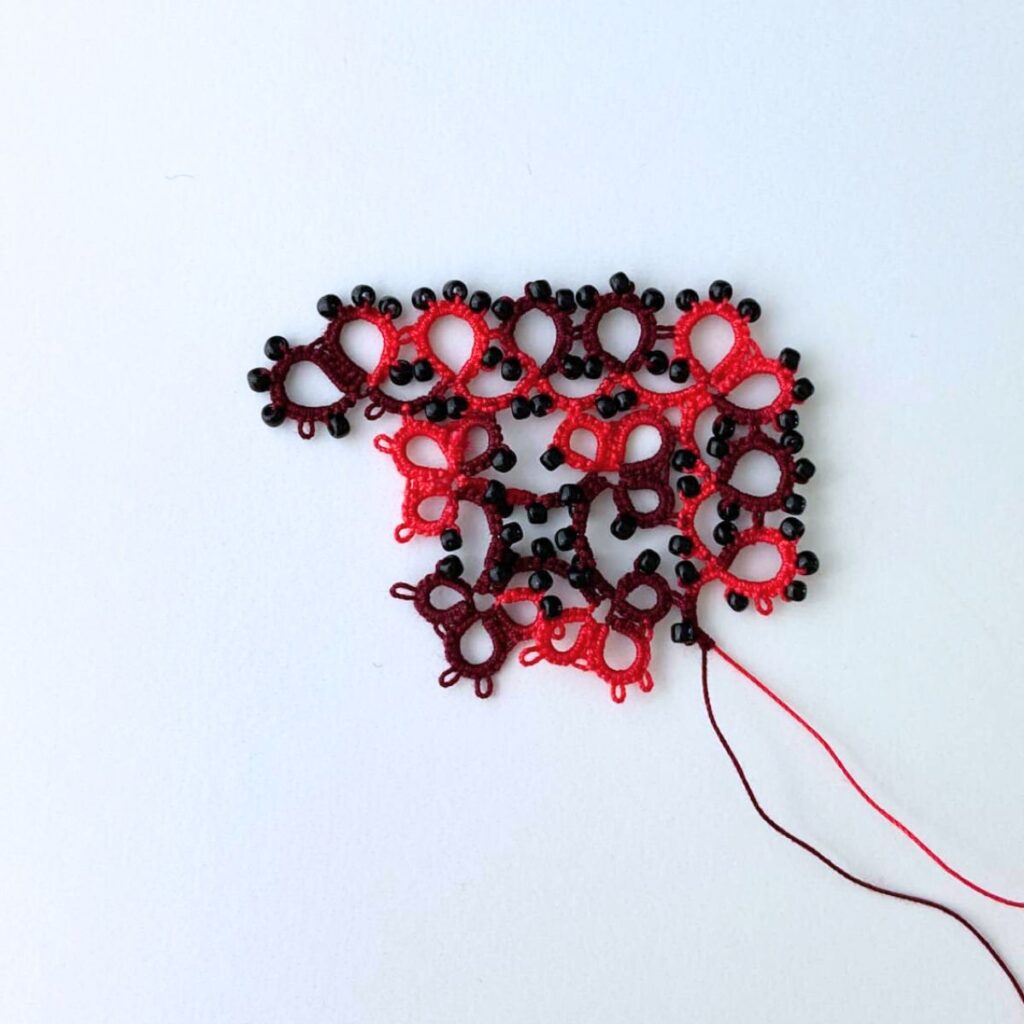
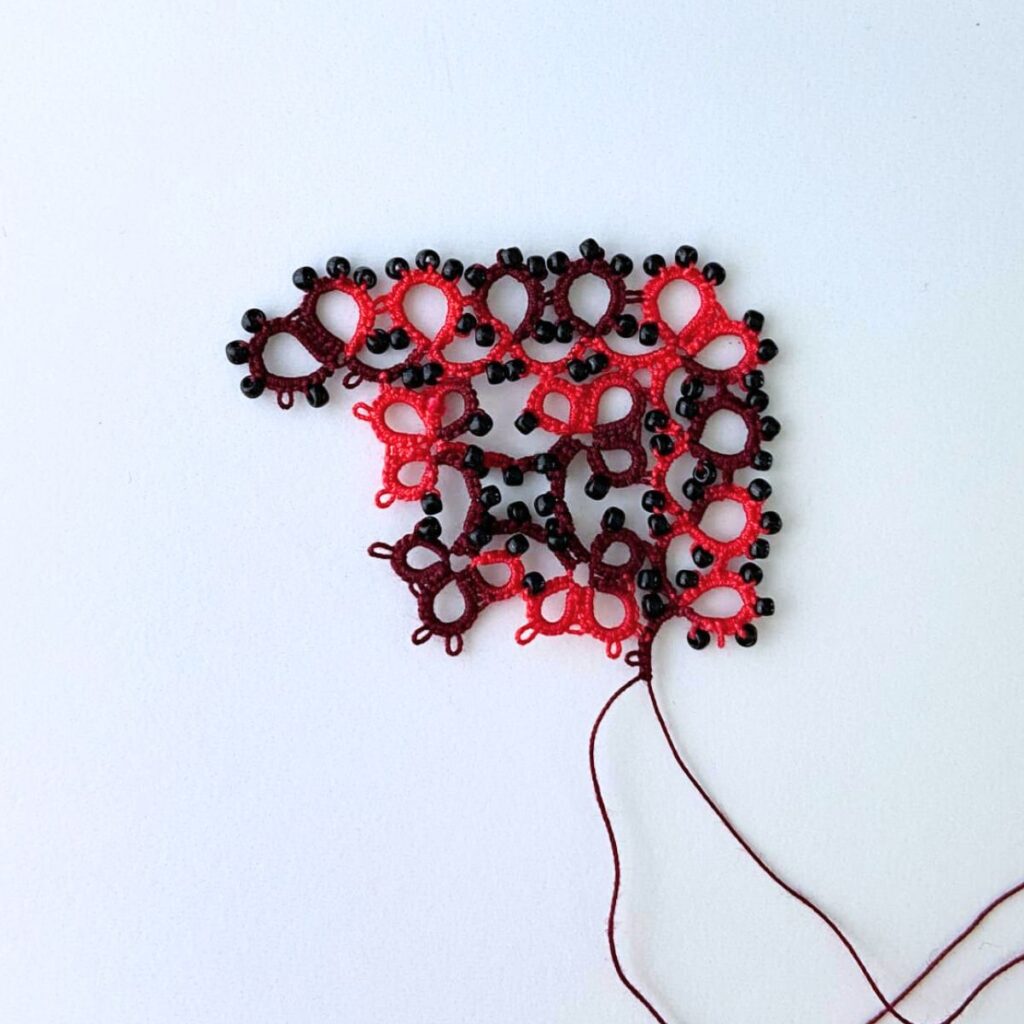
And here below is the tatting diagram for this necklace pendant.
The finished necklace pendant is approx. 2″ wide and 2″ long. You can use a different size thread for making the pendant, but just remember that using a different size thread will change the size of the finished project.
This beaded necklace pendant tatting pattern uses the ball and shuttle tatting method.
Tatting key
- ds = double stitches
- Ch = chain
- R = ring
- (-) = picot
- (+) = join
- b = beaded picot
Go!
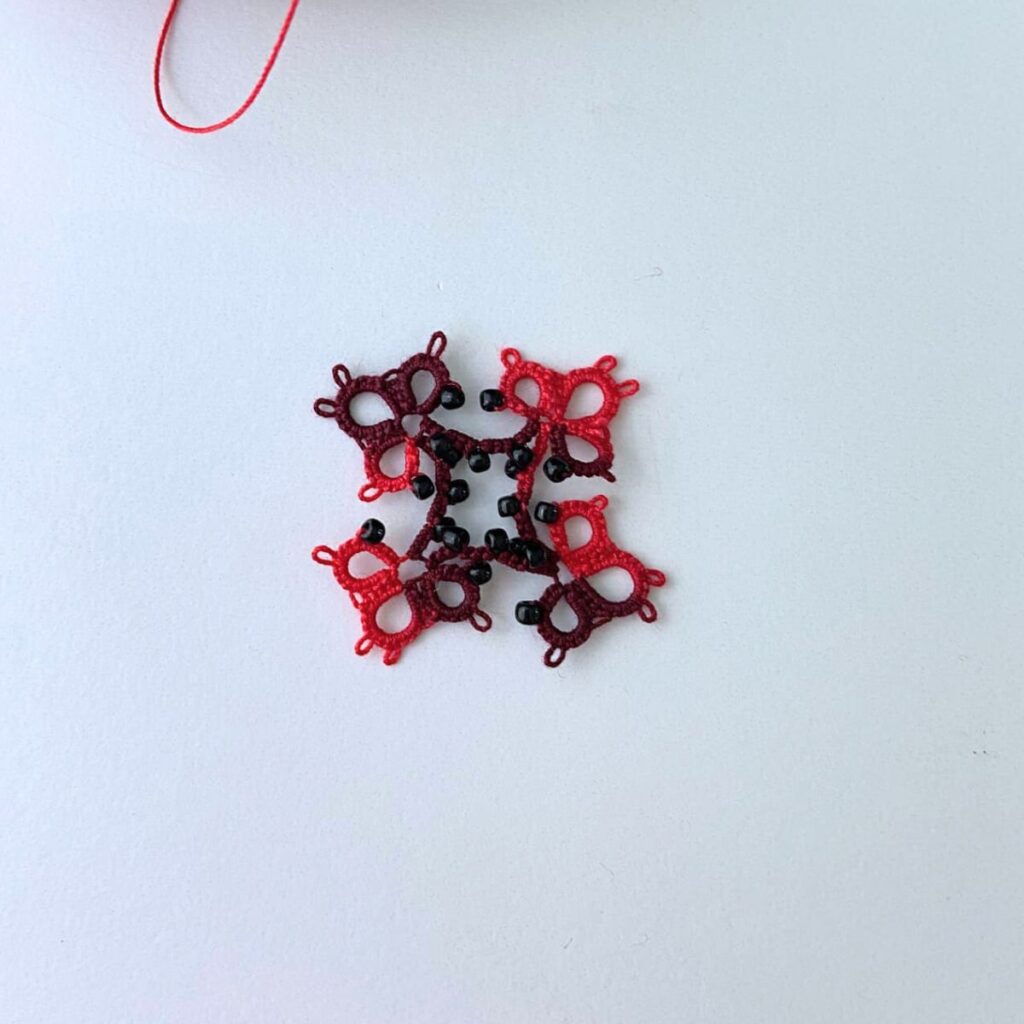
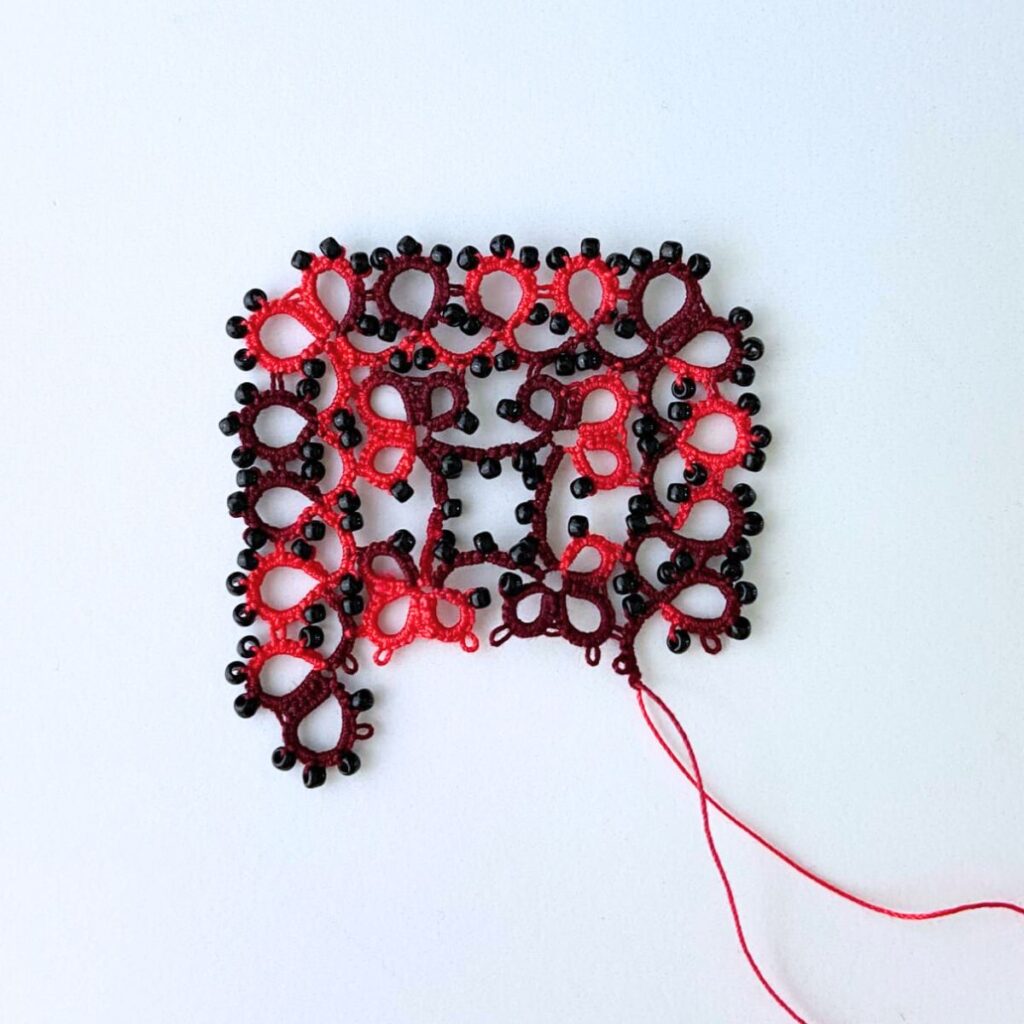
Round 1:
For the first round of the necklace pendant you’ll need to string 20 beads on the thread. Wind your shuttle with the Lizbeth thread.
You’ll need 8 of the beads on your shuttle and 12 beads on the ball thread.
*R: 4ds b 4ds – 4ds – 4ds close.
R: 4ds + 4ds – 3ds – 4ds – 4ds close.
R: 4ds + 4ds – 4ds b 4ds close, turn your work over.
Ch: 3ds b 3ds b 3ds b 3ds, turn.
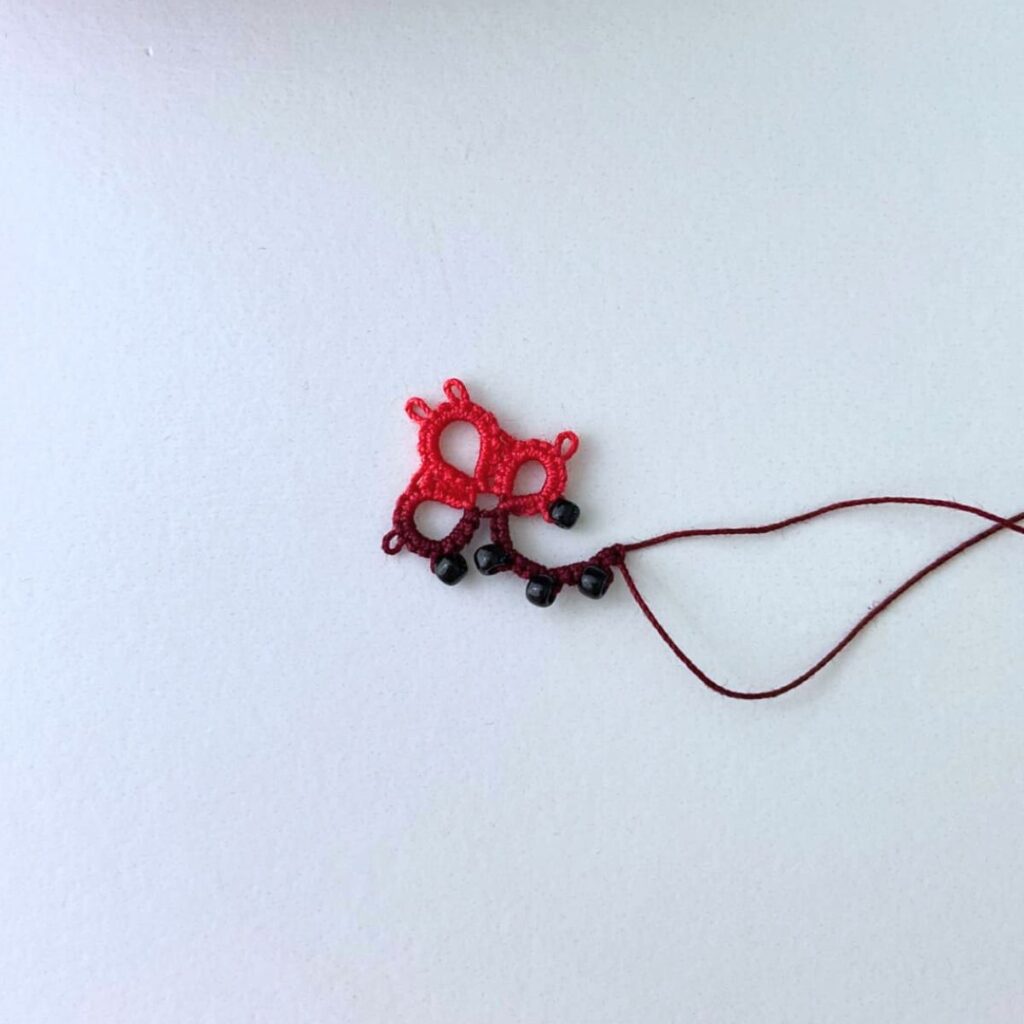
Repeat from the * three more times until you have 4 groups of rings and 4 chains. Connect the last chain you made to the first group of rings and cut and tie off the thread and weave in the ends.
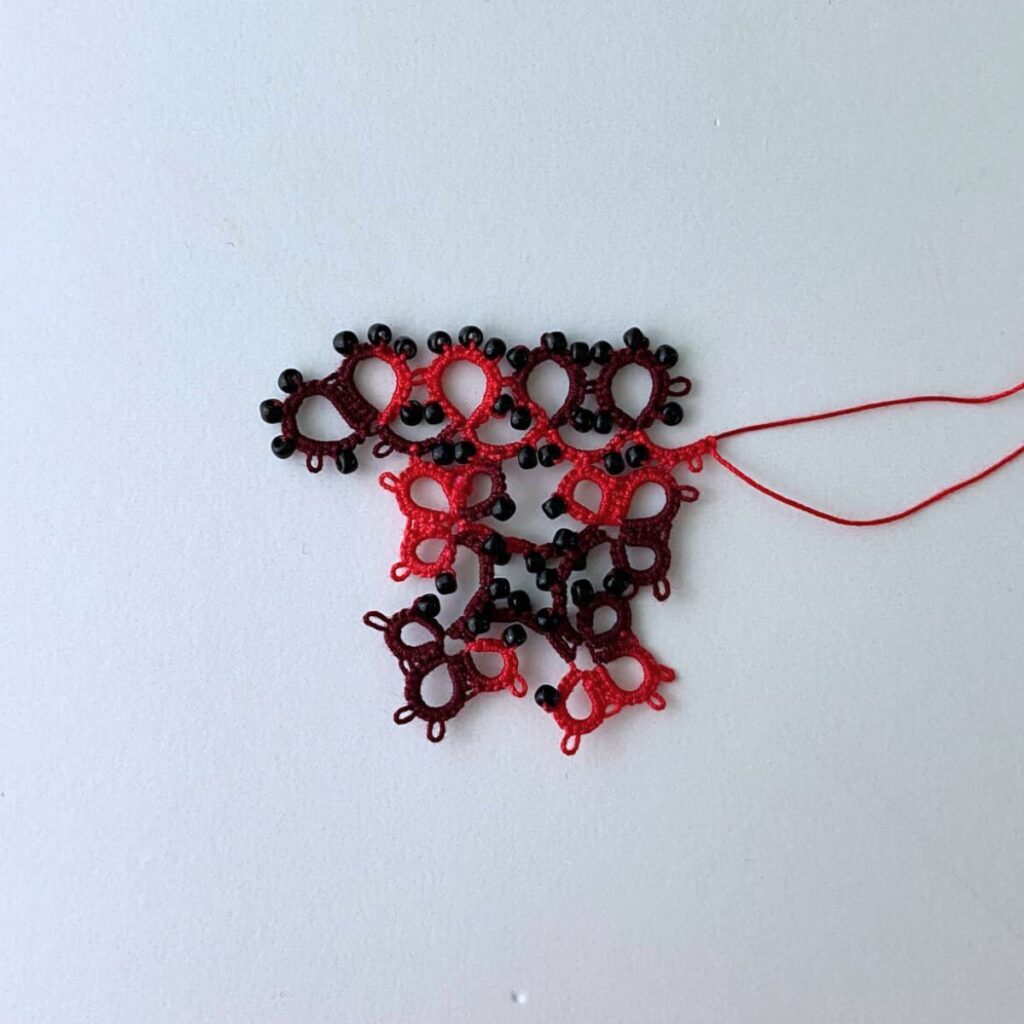
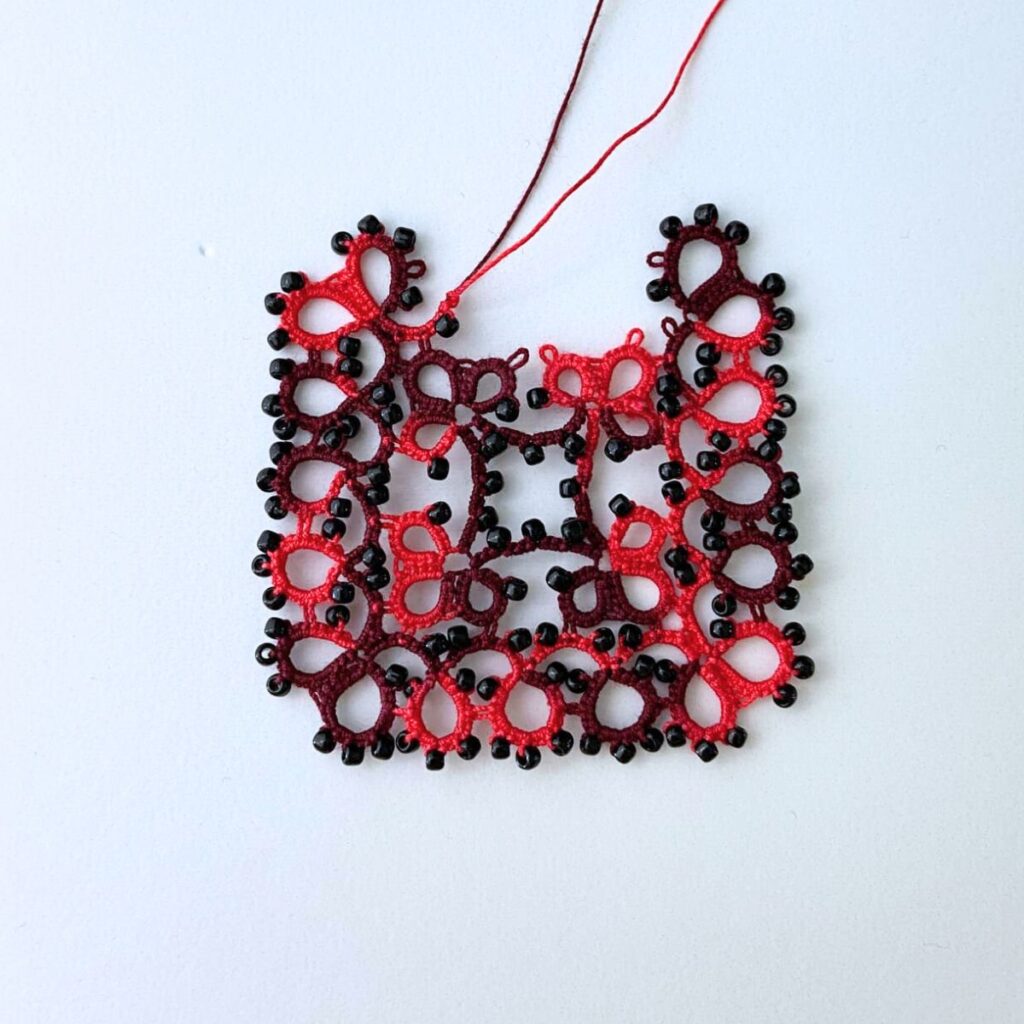
Round 2:
String 116 beads on the thread, you’ll need 24 beads on the chain thread and 92 beads on the shuttle.
R: 3ds b 3ds – 3ds b 3ds b 3ds b 3ds – 6ds close.
R: 6ds + 3ds b 3ds b 3ds b 3ds – 3ds b 3ds close, turn your work.
Ch: 2ds – 2ds, join to a corner picot of round 1, 2ds b 2ds, turn. Hint: the picture below will show you which picot you join the chain to.

R: 3ds b 3ds + 3ds b 3ds b 3ds b 3ds – 3ds b 3ds close, turn.
Ch: 2ds b 2ds + 2ds b 2ds, turn.

R: 3ds b 3ds + 3ds b 3ds b 3ds b 3ds – 3ds b 3ds close, turn.
Ch: 2ds b 2ds + 2ds b 2ds, turn.

R: 3ds b 3ds + 3ds b 3ds b 3ds b 3ds – 3ds b 3ds close, turn.
Ch: 2ds b 2ds + 2ds – 2ds, turn.
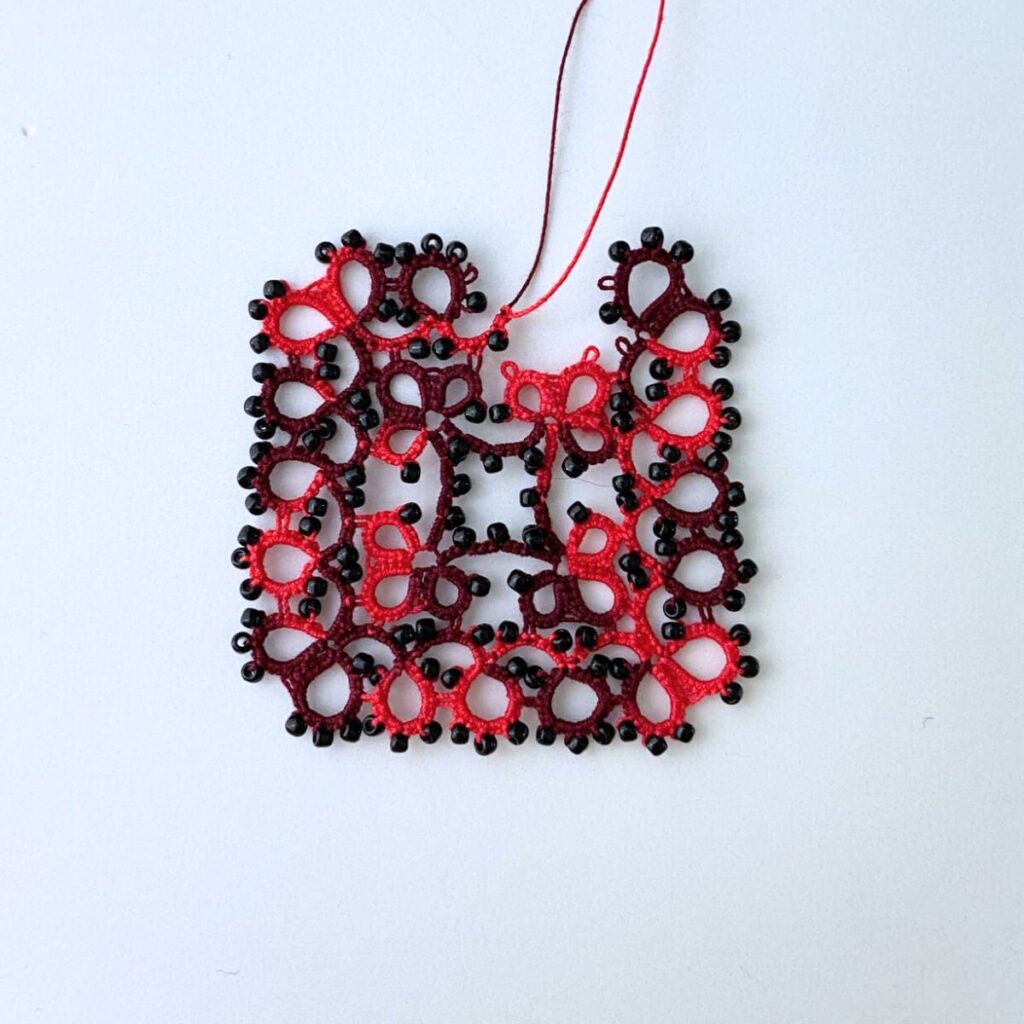
**R: 3ds b 3ds + 3ds b 3ds b 3ds b 3ds – 6ds close.
R: 6ds + 3ds b 3ds b 3ds b 3ds – 3ds b 3ds close, turn.
Ch: 2ds + 2ds + 2ds b 2ds, turn.
R: 3ds b 3ds + 3ds b 3ds b 3ds b 3ds – 3ds b 3ds close, turn.
Ch: 2ds b 2ds + 2ds b 2ds turn.
R: 3ds b 3ds + 3ds b 3ds b 3ds b 3ds – 3ds b 3ds close, turn.
Ch: 2ds b 2ds + 2ds b 2ds turn.
R: 3ds b 3ds + 3ds b 3ds b 3ds b 3ds – 3ds b 3ds close, turn.
Ch: 2ds b 2ds + 2ds – 2ds, turn.
Repeat from ** one more time until you have tatted around three sides of the square. Then continue the following the pattern below to finished the last side.
R: 3ds b 3ds + 3ds b 3ds b 3ds b 3ds – 6ds close.
R: 6ds + 3ds b 3ds b 3ds b 3ds – 3ds b 3ds close, turn.
Ch: 2ds + 2ds + 2ds b 2ds, turn.
R: 3ds b 3ds + 3ds b 3ds b 3ds b 3ds – 3ds b 3ds close, turn.
Ch: 2ds b 2ds + 2ds b 2ds turn.
R: 3ds b 3ds + 3ds b 3ds b 3ds b 3ds – 3ds b 3ds close, turn.
Ch: 2ds b 2ds + 2ds b 2ds turn.
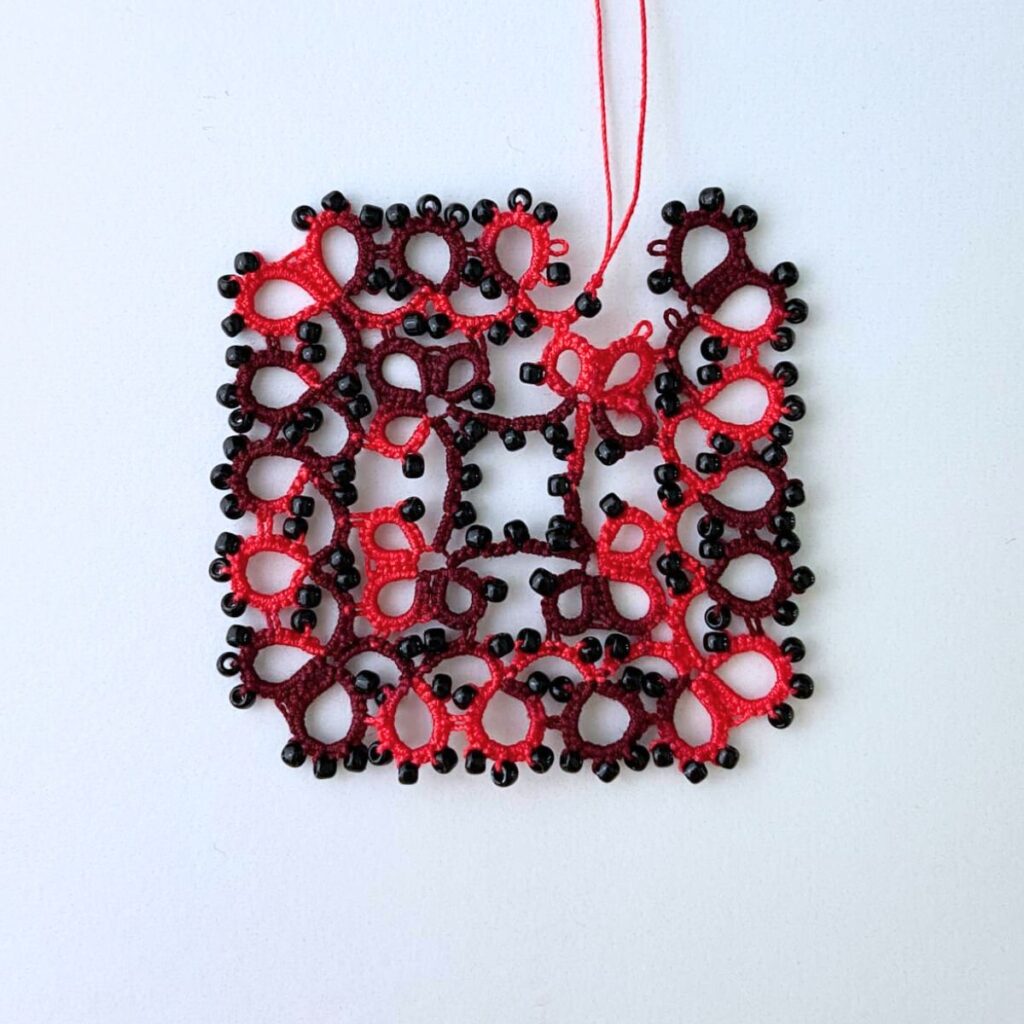
R: 3ds b 3ds + 3ds b 3ds b 3ds b 3ds, join to the first ring you made of round 2, 3ds b 3ds close, turn.
Ch: 2ds b 2ds + 2ds, join to the first chain you made of round 2, 2ds. Connect the end of the chain to the base of the first group of rings you made. Cut and tie off the ends and weave them in.
Making the pendant into a necklace.
Open the jump ring with the jewelry pliers and attach it to the middle ring on one side of the pendant. Now attach the jump ring to the necklace chain and close the jump ring.
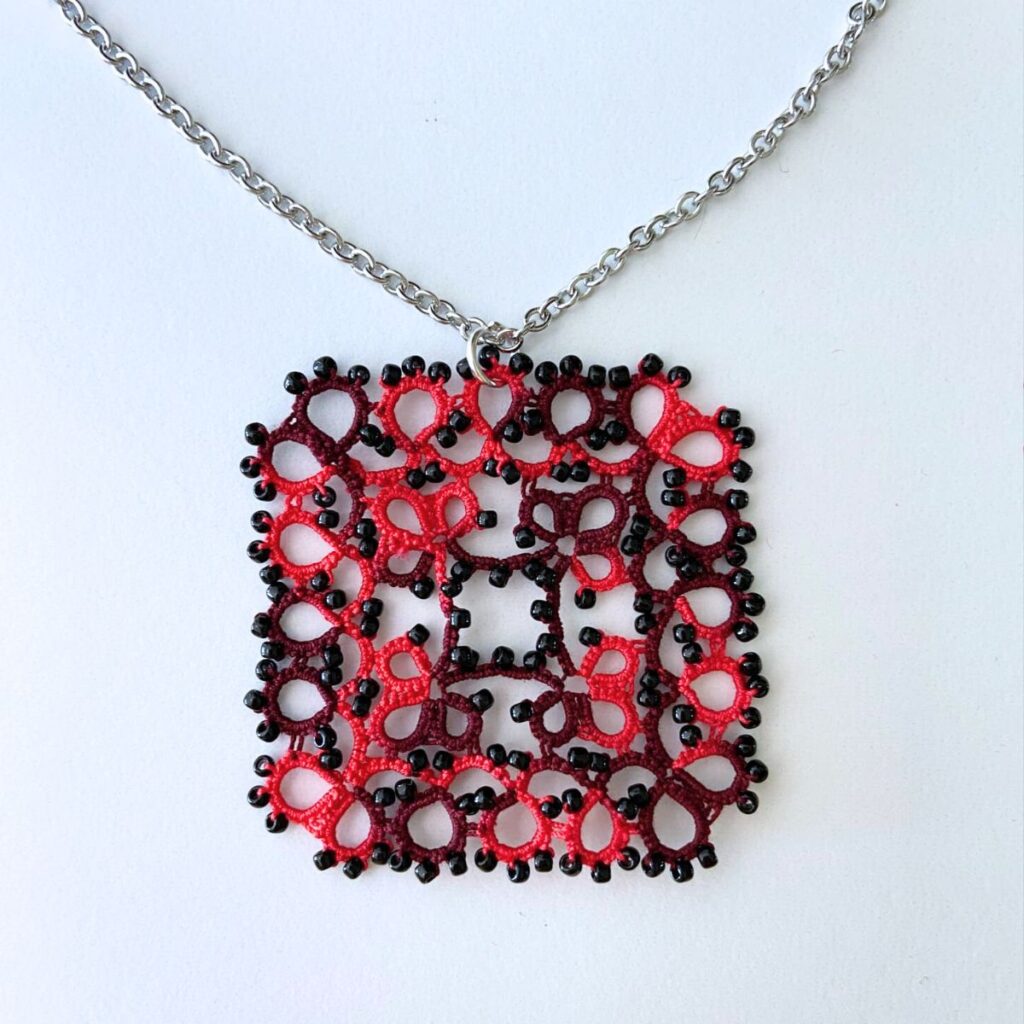
Now you have a finished beaded necklace pendant. This necklace pendant can be made with the beads or even without the beads.
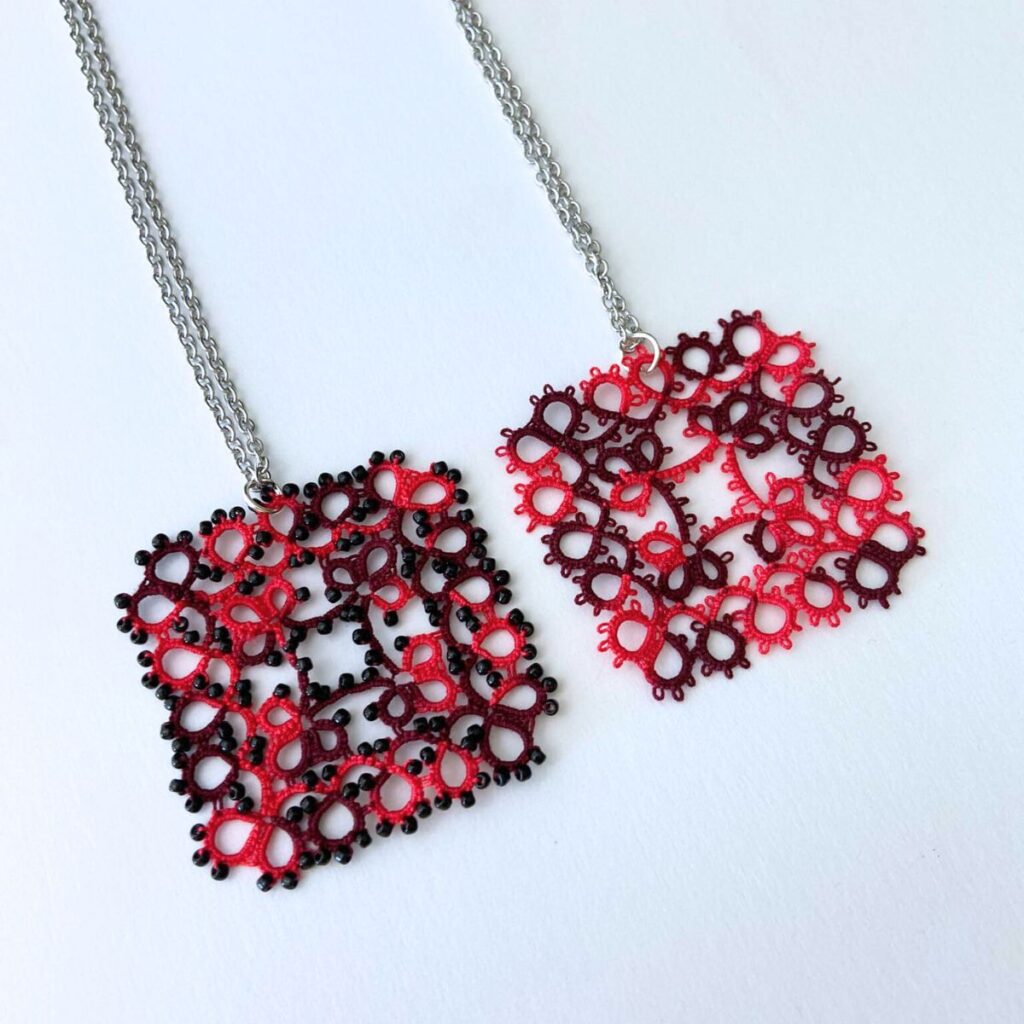
I made the necklace pendant both ways and I don’t know each way I like it better. To me it looks elegant without the beads, but also with the beads.
Thank you for reading this free necklace pendant tatting pattern. And I hope that you enjoy making this free pattern.