Bring a splash of the sea into your crafting with this adorable Jellyfish Tatting and Sewing Pattern! This project blends soft sewing techniques with delicate lace tatting to create a charming jellyfish with a personality all its own. The body is sewn from fabric and features a hand-embroidered face, while five graceful tatted tentacles dangle below like underwater lace tendrils.

A Blend of Soft and Structured
The jellyfish body is sewn from your favorite cotton or linen fabric—solid pastels, soft ocean prints, or even subtle polka dots give it a playful underwater vibe. You can bring your jellyfish to life with simple embroidery: sleepy eyes, a shy smile, or even quirky freckles. This part is fully customizable and makes each jellyfish truly one-of-a-kind.
The Magic Is in the Tentacles
Instead of using yarn or ribbon for the tentacles, this pattern features five hand-tatted tentacles for a beautifully delicate and textured look. Whether you use traditional shuttle tatting or needle tatting, these elegant lace strands add a vintage touch that contrasts beautifully with the soft fabric body.
Save on Your Pinterest for later Here.
Supplies
- Cotton fabric
- Embroidery floss
- Heat erasable pen
- Crochet thread size 10
- Tatting Shuttle or Needle
- Sewing supplies for sewing the body
- Scissors
- Poly-fil
- You can purchase the ad-free PDF Pattern in my Etsy shop Here.
And here is the printable template for the jellyfish body.
The finished jellyfish is approx. 4″ wide at the widest point and approx. 10 ” long with the tentacles.
Tatting key
- ds = double stitches
- Ch = chain
- R = ring
- (-) = picot
- (+) = join
Instructions
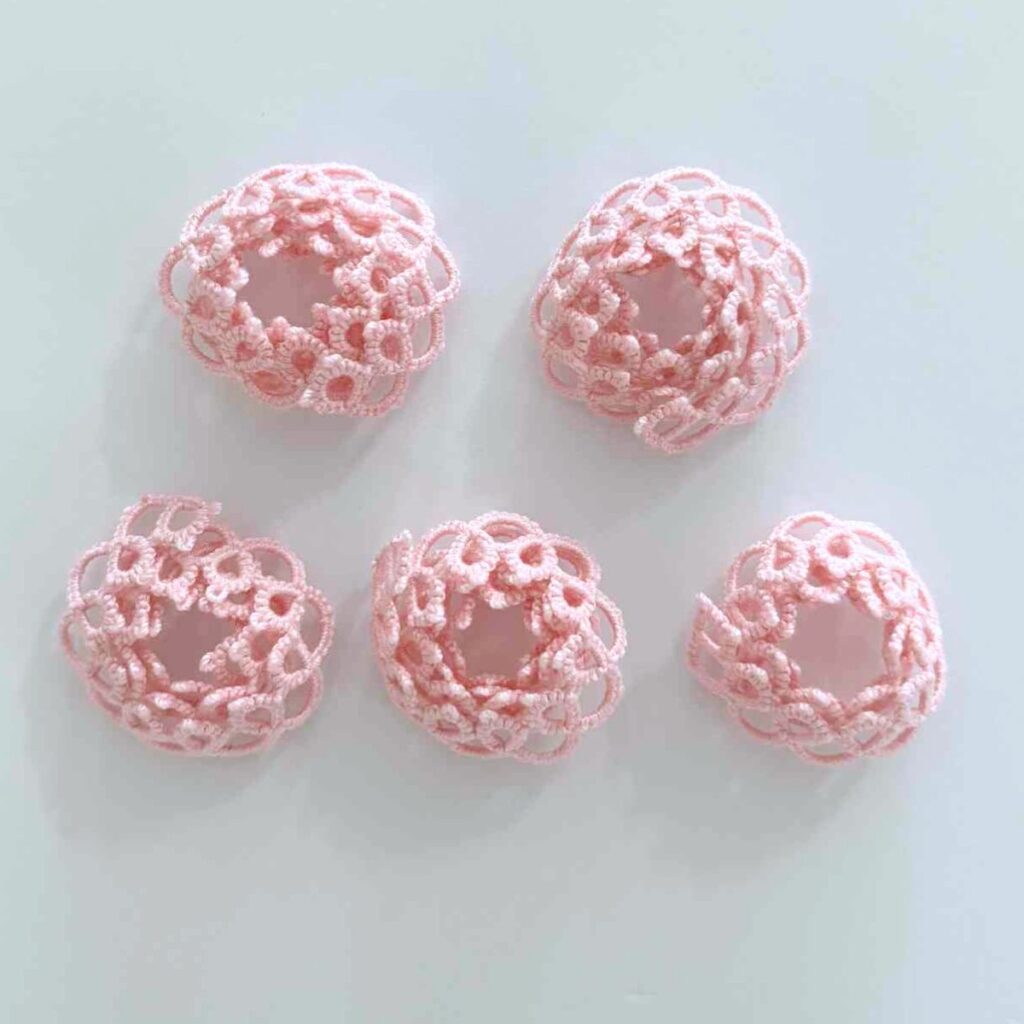
Step 1: Making the tentacles
Wind your shuttle with the crochet thread.
R: 4ds – 4ds – 4ds – 4ds close, turn your work over.
*Ch: 5ds – 5ds, turn.
R: 4ds + 4ds – 4ds – 4ds close, turn.
Repeat from * until you have a tatted tentacle that is 30 rings long. Then, cut and tie off the ends and weave them in.
You’ll need to make 5 tentacles, 3 that are 30 rings long and 2 that are 23 rings long.
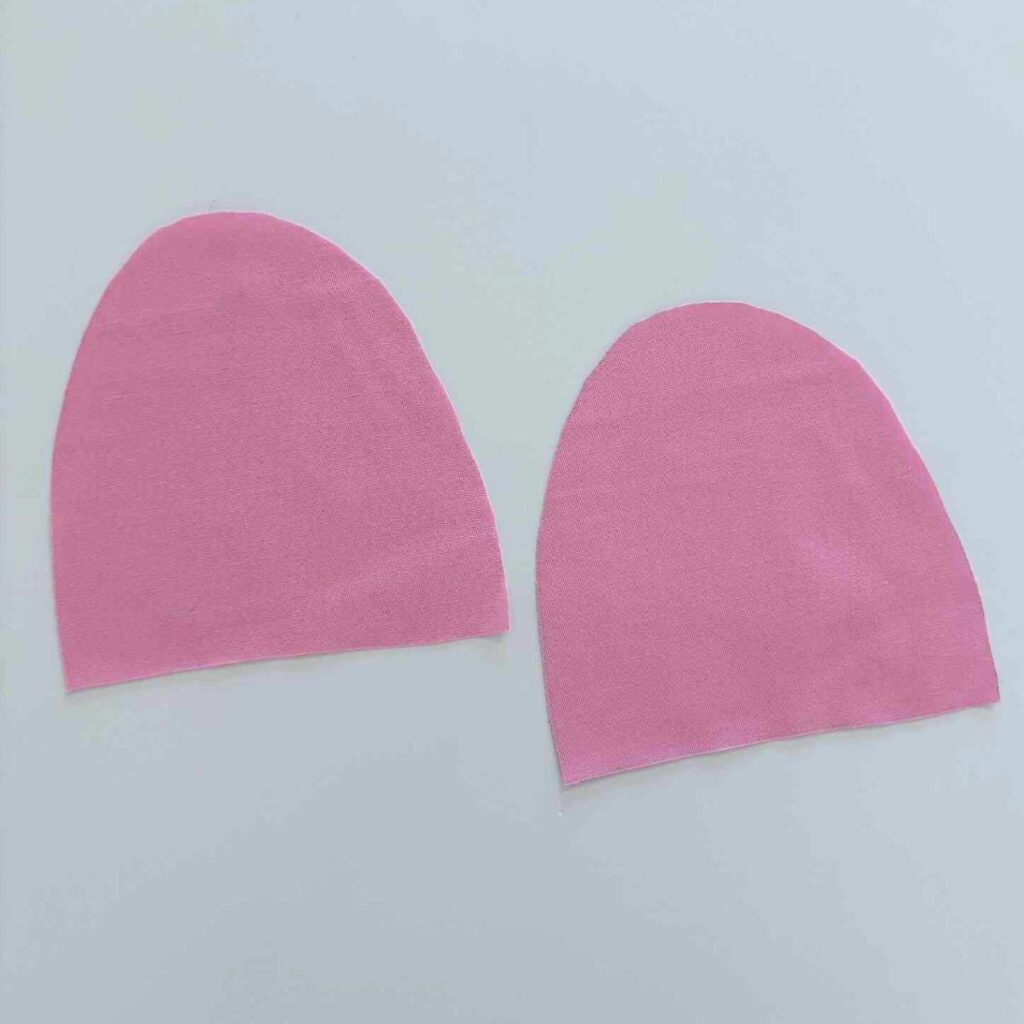
Step 2: Cutting the fabric.
Using the printable pattern for the jellyfish body, cut out 2 pieces of fabric.
Step 3: Embroidering the face.
Using a heat erasable pen, draw a face on one piece of fabric. And embroider the face.


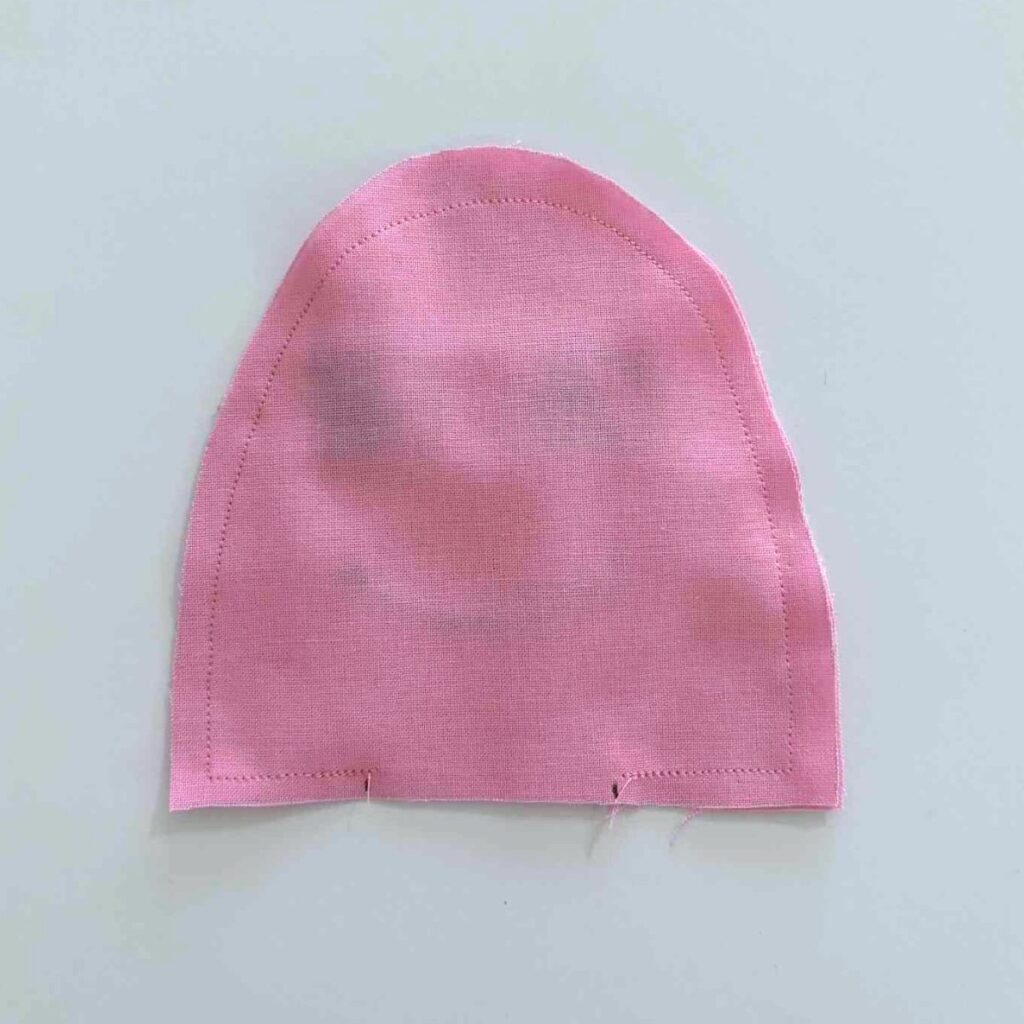
Step 4: Sewing the body.
Place the fabric right sides together and using a 1/4″ seam allowance sew the fabric together leaving a 2″ opening at the bottom.
Step 5: Turn the fabric inside out.
Clip the corners and the rounded top and turn the jellyfish right side out. Press the fabric.

Step 6: Stuff the jellyfish.
Using the poly-fil stuff the jellyfish until it’s as stuffed as you want it. And stitch the gap closed using a ladder stitch, but don’t cut the thread yet.


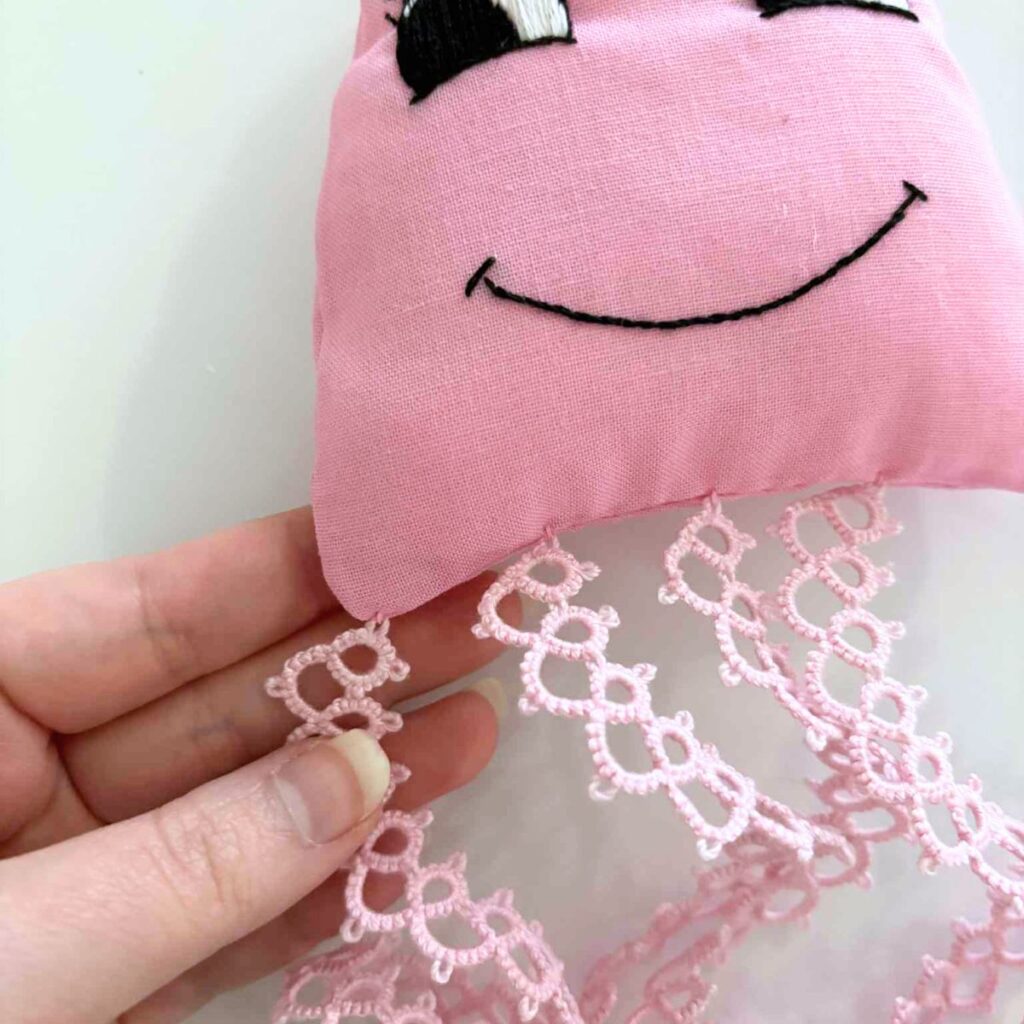
Step 7: Sewing on the tentacles.
Stitch the tentacles on the jellyfish. I like to continue using the thread from stitching the hole closed and go under the fabric to where I want to stitch each tentacle, alternating between long and short tentacles. And I sew the tentacles by stitching through the end picot of the last ring on the tatted tentacle.
And now you have a finished jellyfish! Whether you’re new to tatting or a seasoned pro, this jellyfish pattern is a wonderful way to merge classic tatting with sewing.
Check out some of my other free tatting patterns.
- Free and Easy Sunflower Tatting Pattern.
- Free Sunny Sunflower Tatting Pattern.
- Free Four Leaf Clover Tatting Pattern.
- Free and Easy Heart Tatting Pattern and Diagram.
- Beaded Necklace Pendant Tatting Pattern.
- Free Beaded Christmas Tree Tatting Pattern.
- Free Flower Bookmark Tatting Pattern and Tutorial.