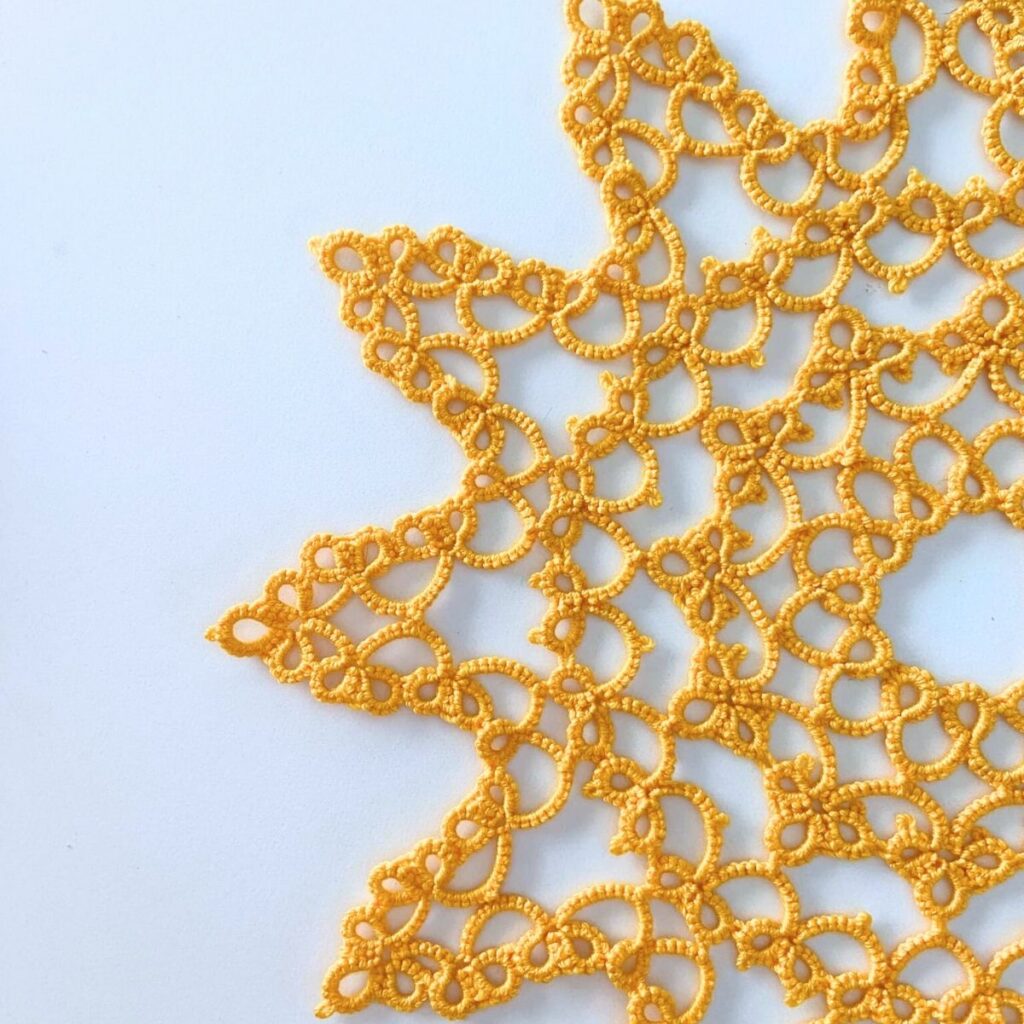
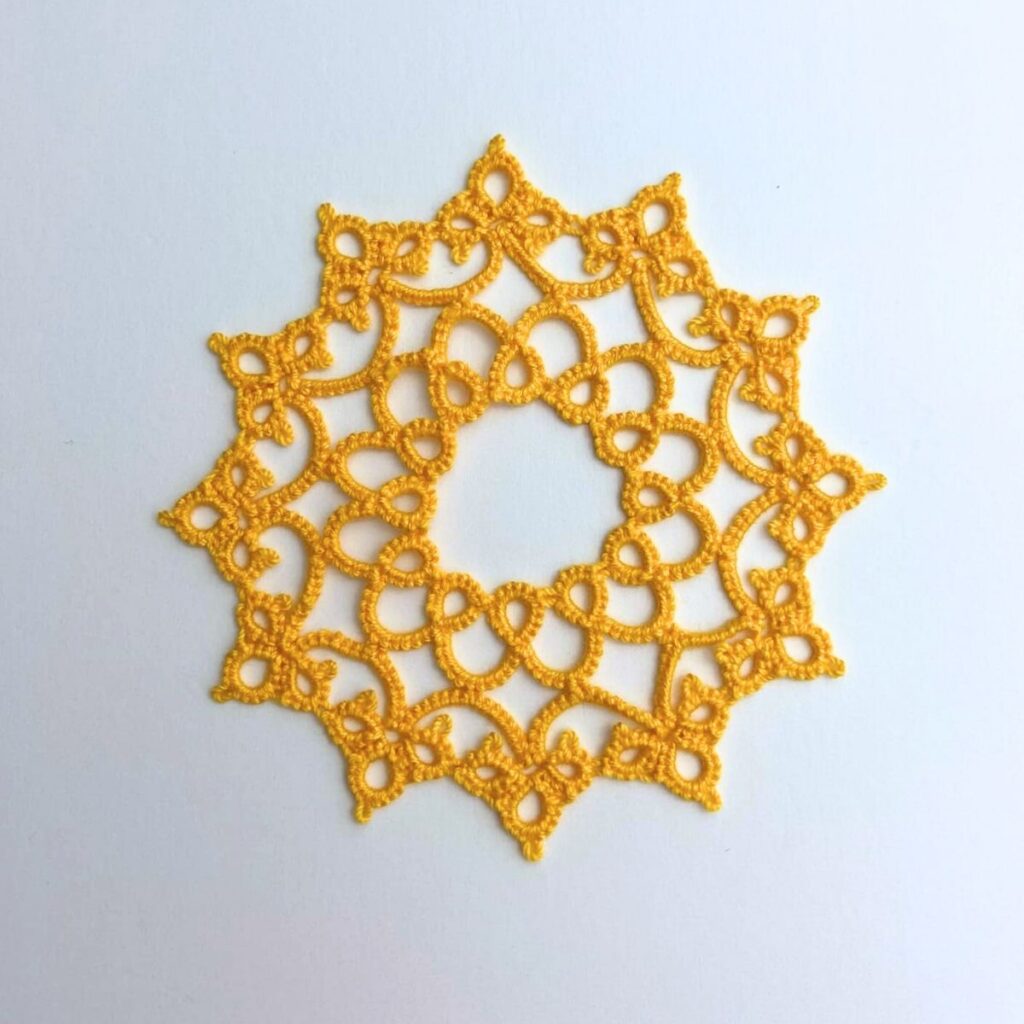
Here is another free pattern that’s perfect for Spring or Summer. This is a free sunny doily tatting patten.
A doily is used to decorate tables and is also used to help protect tabletops from getting scratched or from moisture. Doilies are usually lace-like and can be made from fabric or paper, and can be crocheted, knitted or like this pattern tatted.
Even though doilies are used to help protect surfaces, I think of them for more decorative purposes, like decorating a table or using them under flower vases.
This doily tatting pattern is a intermediate tatting pattern. Doilies are little bigger than other tatting patterns like ornaments and have a few more rounds. And doily tatting patterns usually repeat a lot, but it might be confusing for beginner tatters.
Save this post on your Pinterest for later Here.
* This Post may contain affiliate links*
Supplies
- Size 10 Crochet Thread in Yellow
- Tatting Shuttle or Tatting Needle
- Small Crochet Hook (optional)
- You can also purchase the ad-free PDF pattern in my Etsy shop Here.
And here is the free tatting diagram for this sunny doily pattern.
A finished doily is approx. 9″ across.
And I made this doily using shuttle tatting, but you could make this pattern by needle tatting.
Tatting key
- ds = double stitches
- Ch = chain
- R = ring
- (-) = picot
- (+) = join
Go!
Round 1:
Wind your shuttle with the crochet thread.
R: 5ds – 5ds – 5ds close, turn your work over.
Ch: 6ds – 6ds, turn.
R: 5ds + 5ds – 5ds close, turn your work over.
Ch: 6ds – 6ds, turn.
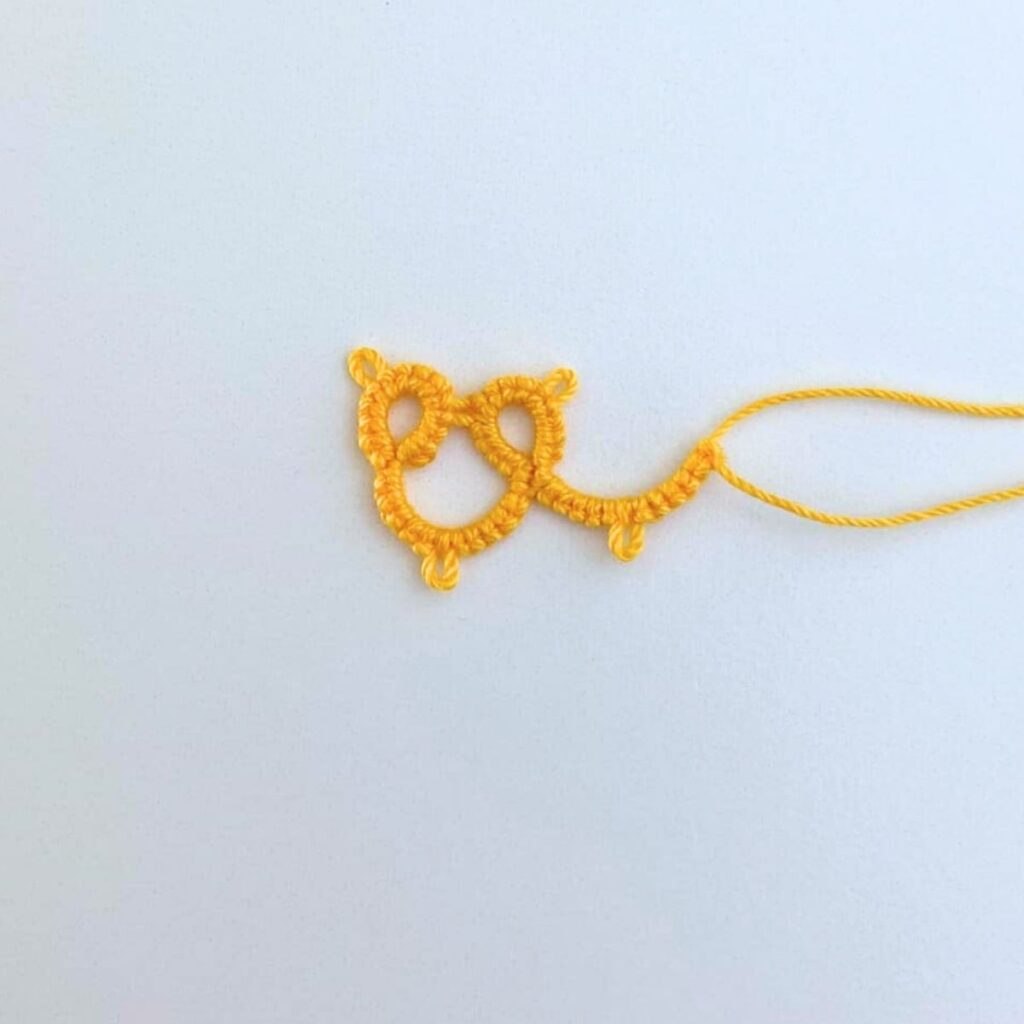
Repeat the last ring and chain until you have a circle of 12 connected rings and chains, making sure to connect the last ring to the ring before and the first ring you made. Connect the last chain to the base of the first ring you made and cut and tie off the ends and weave them in.

Round 2:
Wind the shuttle with the same color thread as round 1.
R: 3ds – 3ds – 3ds – 3ds close.
R: 3ds + 5ds – 5ds – 3ds close.
R: 3ds + 3ds – 3ds – 3ds close, turn your work over.
Ch: 8ds, join to one of the chain picot of round 1, 8ds, turn.
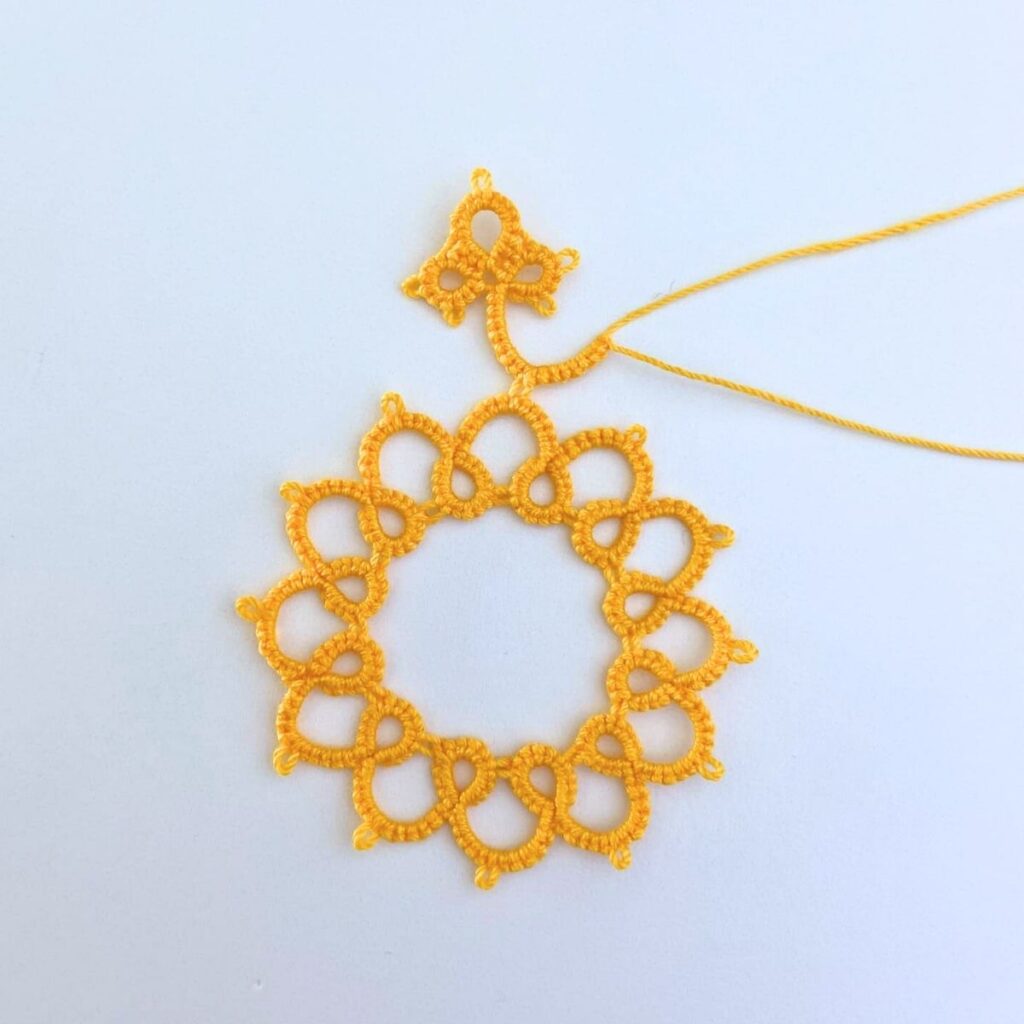
* R: 3ds – 3ds join to the middle picot of the last ring you made, 3ds – 3ds close.
R: 3ds + 5ds – 5ds – 3ds close.
R: 3ds + 3ds – 3ds – 3ds close, turn your work over.
Ch: 8ds + 8ds, turn.

Repeat from ** 9 more times and continue the pattern below.
R: 3ds – 3ds + 3ds – 3ds close.
R: 3ds + 5ds – 5ds – 3ds close.
R: 3ds + 3ds, join to the first ring you made of round 2, 3ds – 3ds close, turn your work over.
Ch: 8ds + 8ds, connect to the base of the first group of rings. Cut and tie off the thread and weave in the ends.
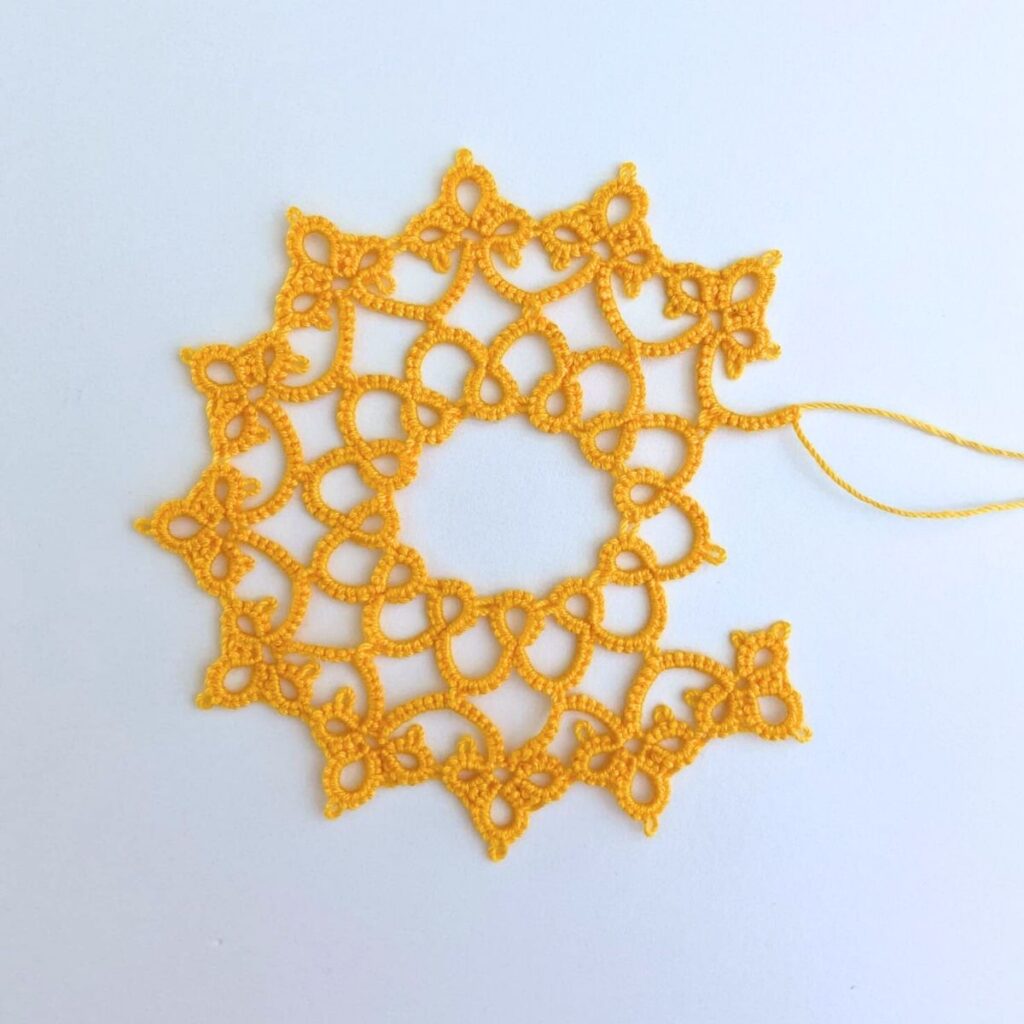
Round 3:
Wind your shuttle with the crochet thread.
R: 5ds – 3ds – 3ds – 2ds close.
R: 2ds + 3ds – 3ds – 5ds close, turn your work over.
Ch: 7ds join to the top ring picot of round 2, 7ds, turn your work.

**R: 5ds + 3ds – 3ds – 2ds close.
R: 2ds + 3ds – 3ds – 5ds close, turn.
Ch: 7ds – 7ds, turn. Hint: You’ll only connect every other chain to round 2.
R: 5ds + 3ds – 3ds – 2ds close.
R: 2ds + 3ds – 3ds – 5ds close, turn.
Ch: 7ds + 7ds, turn.

Repeat from ** 10 more times and continue the pattern below.

R: 5ds + 3ds – 3ds – 2ds close.
R: 2ds + 3ds – 3ds join to the first ring you made of this round, 5ds close, turn your work.
Ch: 7ds – 7ds, connect to the base of the first group of rings you made of this round. Cut and tie off the ends and weave them in.

Round 4:
Wind you shuttle with the crochet thread, and this is the last round of the doily.
R: 6ds – 3ds – 3ds close.
R: 3ds + 6ds – 4ds close, turn your work over.
Ch: 7ds – 7ds, turn.
R: 4ds + 6ds – 3ds close.
R: 3ds + 6ds – 4ds close, turn.
Ch: 7ds, turn.
R: 4ds + 6ds – 3ds close.
R: 3ds + 6ds – 6ds – 3ds close.
R: 3ds + 6ds – 4ds close, turn your work.
Ch: 7ds, turn.

R: 4ds + 6ds – 3ds close.
R: 3ds + 6ds – 4ds close, turn.
Ch: 7ds + 7ds, turn.
R: 4ds + 6ds – 3ds close.
R: 3ds + 3ds – 6ds close, turn.
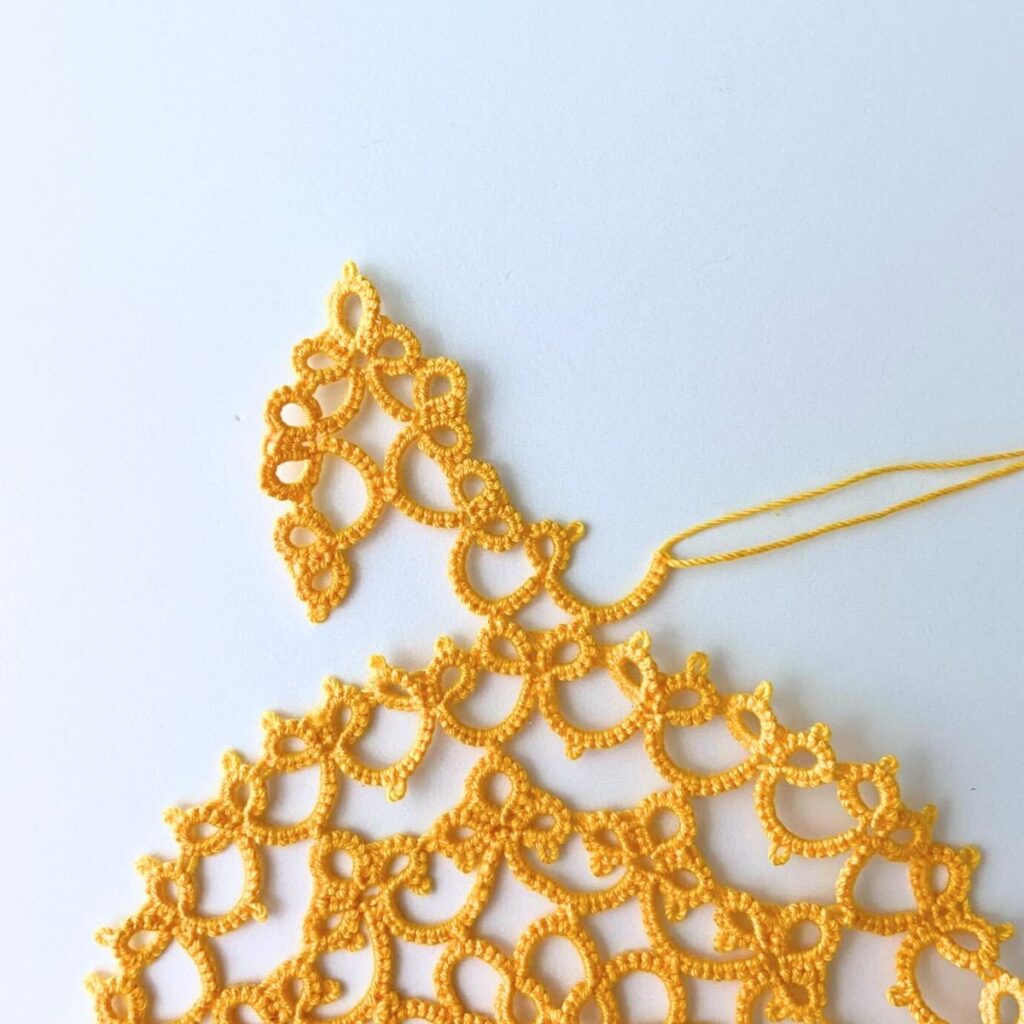
Ch: 10ds, join to a ring picot on round 3, 5ds, turn. (Look at the picture below to see where I joined it.)
R: 4ds + 4ds – 4ds close, turn you work.
Ch: 5ds + 10ds, turn.
***R: 6ds + 3ds – 3ds close.
R: 3ds + 6ds – 4ds close, turn your work over.
Ch: 7ds – 7ds, turn.
R: 4ds + 6ds – 3ds close.
R: 3ds + 6ds – 4ds close, turn.
Ch: 7ds, turn.
R: 4ds + 6ds – 3ds close.
R: 3ds + 6ds – 6ds – 3ds close.
R: 3ds + 6ds – 4ds close, turn your work.
Ch: 7ds, turn.

R: 4ds + 6ds – 3ds close.
R: 3ds + 6ds – 4ds close, turn.
Ch: 7ds + 7ds, turn.
R: 4ds + 6ds – 3ds close.
R: 3ds + 3ds – 6ds close, turn.
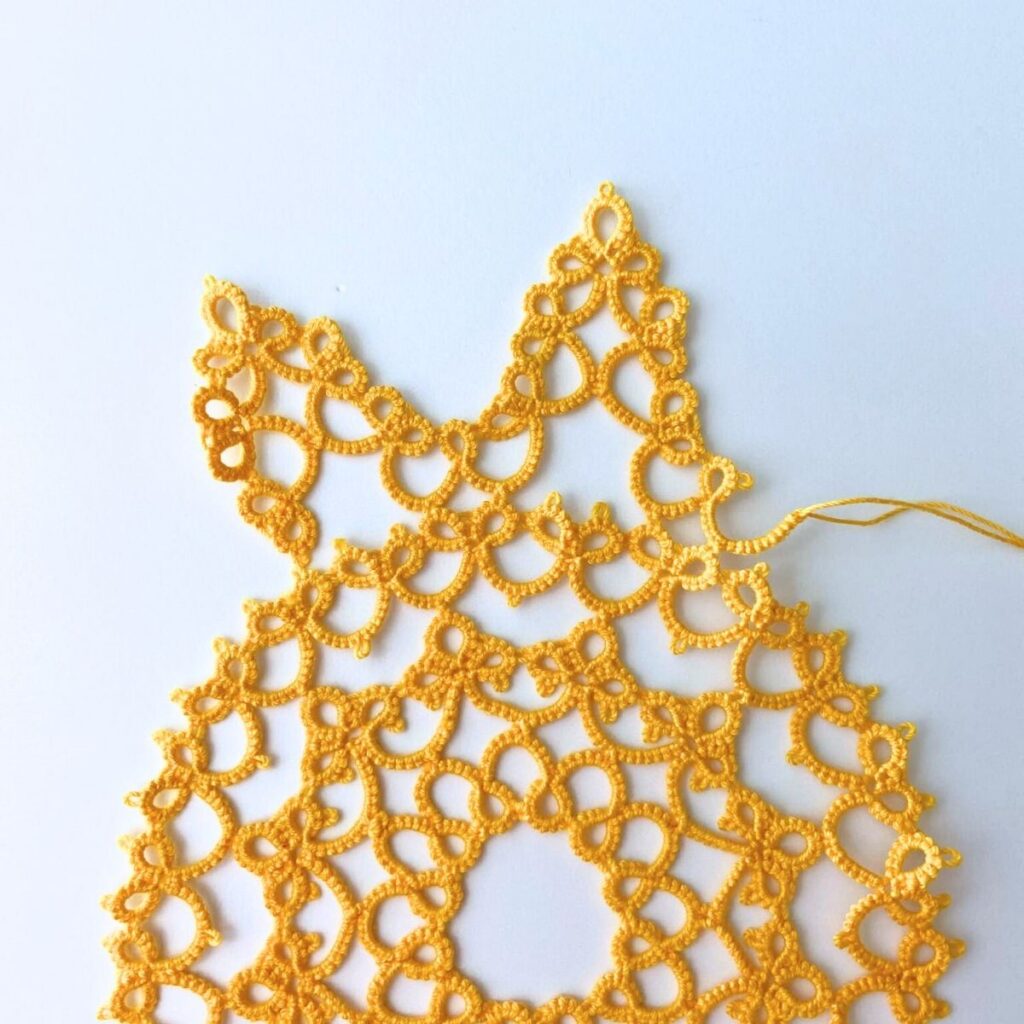
Ch: 10ds, skip 2 picots of round 3 and join this chain to the third picot from the last picot you joined on round 3, 5ds, turn.
R: 4ds + 4ds – 4ds close, turn you work.
Ch: 5ds + 10ds, turn.
Repeat from *** 9 more times, then continue the pattern below.

R: 6ds + 3ds – 3ds close.
R: 3ds + 6ds – 4ds close, turn your work over.
Ch: 7ds – 7ds, turn.
R: 4ds + 6ds – 3ds close.
R: 3ds + 6ds – 4ds close, turn.
Ch: 7ds, turn.
R: 4ds + 6ds – 3ds close.
R: 3ds + 6ds – 6ds – 3ds close.
R: 3ds + 6ds – 4ds close, turn your work.
Ch: 7ds, turn.

R: 4ds + 6ds – 3ds close.
R: 3ds + 6ds – 4ds close, turn.
Ch: 7ds + 7ds, turn.
R: 4ds + 6ds – 3ds close.
R: 3ds + 3ds – 6ds close, turn.
Ch: 10ds, skip 2 picots of round 3 and join this chain to the third picot from the last picot you joined on round 3, 5ds, turn.
R: 4ds + 4ds, join to the first ring you made of this round, 4ds close, turn you work.
Ch: 5ds + 10ds, connect to the base of the first group of rings you made. Cut and tie off the ends and weave them in.

Now, that you have the doily completed the next step is to block the doily. You’ll block tatted project to get them to lay flat and not look wonky.
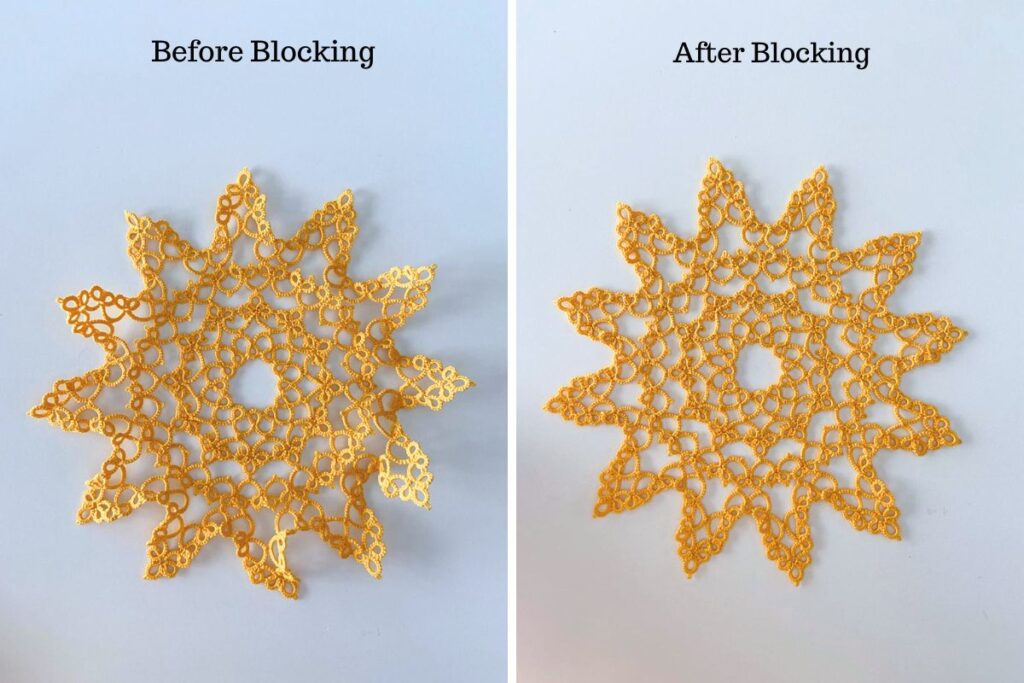
I like to block my projects by spraying them with water and just stretching them out until they lay flat. Then I just let them dry on the counter-top or table.

Thank you for reading this new pattern for the sunny doily. I hope that you have enjoyed it and that you use it to make many doilies.
Check out some of my other free tatting patterns.
- Free and Easy Sunflower Tatting Pattern.
- Free Sunny Sunflower Tatting Pattern.
- Free Four Leaf Clover Tatting Pattern.
- Free and Easy Heart Tatting Pattern and Diagram.
- Beaded Necklace Pendant Tatting Pattern.
- Free Beaded Christmas Tree Tatting Pattern.
- Free Flower Bookmark Tatting Pattern and Tutorial.