Triangles are one of the most used shapes in making a quilt. Especially half square triangles, also known as HST. A half square triangle is a square that is made of two right triangles. And you’ll find that a lot of quilt patterns use half square triangle in their design. So, in this post I’m going to show you a real easy way to make these half-square triangles.
There are different ways to make these where you can make 2, 4 or 8 half square triangles at a time. But, in the blog post I’m going to show you how to make 2 half square triangles at a time.
And there are quilts made entirely of half square triangle blocks, like windmill quilts. You can also look on Pinterest to find all kinds of different, unique half-square triangle quilt patterns or you could even create your own pattern. I love looking on Pinterest for different patterns. Like quilt patterns, sewing patterns, embroidery ideas, felt crafts, knitting and crocheting patterns, and also for different crafting ideas. You can also find crafting tips and tutorials.
Okay, back to quilting, besides triangles there are all kinds of different shapes you can use in quilting. And a great way to get different shapes is to use quilt rulers. You can get quilt rulers in different sizes and shapes. And the best way to cut your fabric is to use a rotary cutter and cutting mat. I know since I’ve started using mine, that it’s my favorite way to cut up all my quilting fabric. You can get the fabric shapes is much more accurate than using scissors.
Also, there are all kinds of different fabric you can use in a quilt. To me the best fabric you can use is fabric bundles. Like fat quarters, layer cakes, charm packs and jelly rolls. You can also use many other fabrics besides cotton fabric.
Save this post on your Pinterest board for later Here.
Cutting the fabric for your HST
Your first question maybe how big of a square to cut out of your fabric to get the right size half square triangle. For normal plain quilt squares you’ll cut the fabric square a half of an inch bigger than the size you want it to be. For example if you want your finished square to be 3 inches , you’ll cut the fabric square 3.5 inches. That’s if you use the normal 1/4 inch seam allowance.
But for half-square triangle units it’s a little different. Instead of a half of an inch, you need to add 7/8 of an inch to size you want. For example if you want a a 3 inch finished half square triangle you”ll need to cut two fabric squares that are 3 and 7/8 inches.
I know it sounds confusing, but the more you do it the easy and less confusing it is.
And you maybe wondering what I mean by finished square. A finished square block or quilt block is after you have added the block to the quilt top, so it has lost it’s seam allowances. And since a seam allowance is usually 1/4 inch all the way around the square, that means that the unfinished size is a half of an inch bigger than what the finished size will be.
And the best way to cut out the fabric squares is to use a square ruler or I use a long rectangle acrylic ruler. The long rectangle ruler is great for cutting long strips of fabric or also smaller pieces of fabric. There are so many different types of rulers you can get for cutting out your quilting fabric.
Making your HST
Step 1: The first thing you need to do is to cut out your pair of squares using two different fabrics. Remember to cut out your squares of fabric 7/8 of an inch larger than you want the finished size you need.

Step 2: On the wrong side of one of the squares draw a diagonal line on the square. I like to use a regular pencil, because the pencil mark doesn’t show on the right side and it also doesn’t bleed through the fabric like a marker might.

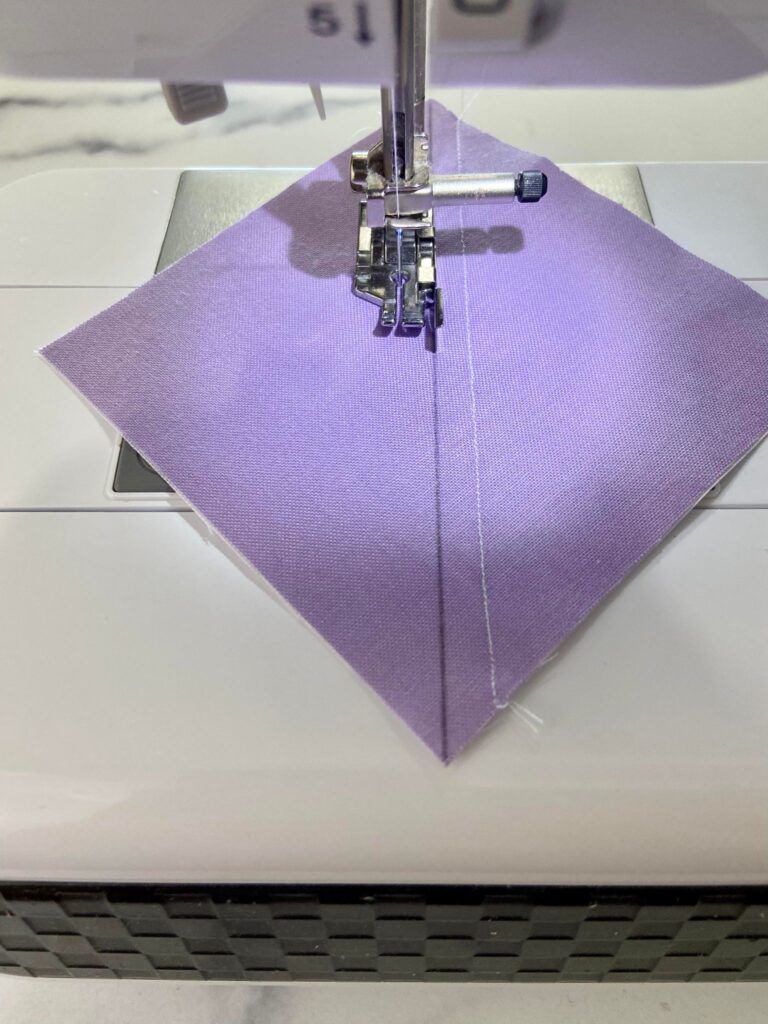
Step 3: Place the two squares right sides together and with the marked square facing up, take the squares to your sewing machine. Now stitch on both sides of the diagonal line using a quarter inch seam allowance. And it helps to use a quarter-inch presser foot to keep your diagonal seam straight.
Step 4: Using your rotary cutter or a pair of scissors, cut the fabric square between the seams on the drawn diagonal line.

Step 5: Now press the seams. I like to finger press my seams before I take them to the ironing board. And you can press the seam to the side or open. I prefer to press all my seams open, I find that makes the seams less bulky.

Step 6: Now all that’s left is to trim the dog ears. The dog ears are the part of the seam that’s poking out of the corners. You don’t have to trim them, but I think it makes the HST units look neater.
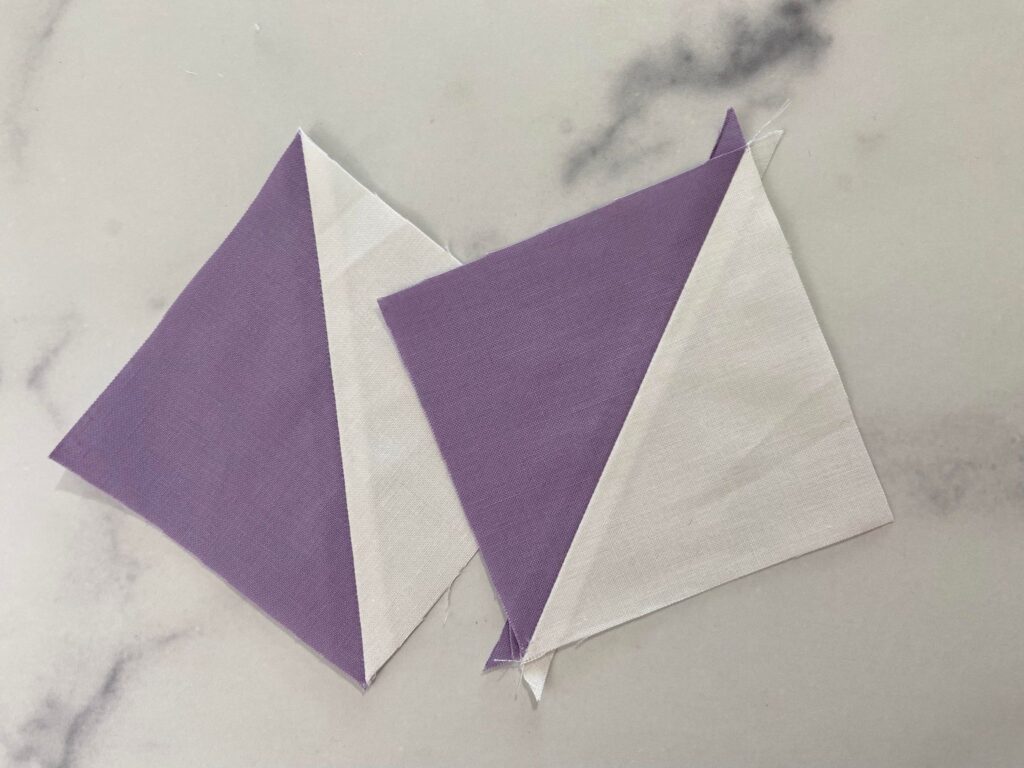
Now you have two half square triangle blocks. There are different methods to making these, but I showed you what the easiest way I know to make HST blocks. I may do more blog posts on how to make 4 or 8 half square triangles at a time. And I think there’s even a way you can 16 at a time. But, instead of trying to show you all of it in one post (that maybe kind of overwhelming), I may do it in a half square triangle series. So, I guess that this one would be considered part 1.
And these triangle squares are great for making a more complex looking quilts. But, half square triangle quilt blocks are really not that hard to make. They really look more complicated then they are, and you can find plenty of HST quilt patterns online.

Be sure to check out my other quilting posts
- My favorite 3 threads for piecing a quilt.
- The best tools for marking your fabric for quilting.
- What are the best curved safety pins for quilting?
- Tips on how to cut fabric accurately for quilting.
- A guide for the best thread to use for hand quilting.
And I also have posts on sewing, tatting (both needle and shuttle tatting), felt crafts and more.