If you love cheerful kitchen projects, this easy ruffled apron sewing tutorial is the perfect weekend make! I made this apron out of a beautiful yellow fabric for the main body and black fabric with yellow accents for the ties, neck strap, and a wide statement ruffle along the bottom. The contrast makes the ruffle pop while still tying everything together in the sweetest way.

Whether you’re baking cookies, crafting, or just want to feel cute in the kitchen, this apron is practical, washable, and totally beginner-friendly.
Save on your Pinterest for later Here.
Why You’ll Love This Apron
- ✂️ Beginner-friendly straight seams
- 👗 Flowy, wide ruffle for a feminine touch
- 🧵 Great stash-buster project
Supplies
- 1 yard cotton fabric (apron body)
- 1/2 yard accent fabric (ties, neck strap, ruffle)
- Matching threads
- Fabric scissors or rotary cutter
- Pins or clips
- Sewing machine
- Iron
- Fabric tube turner
Cutting Instructions
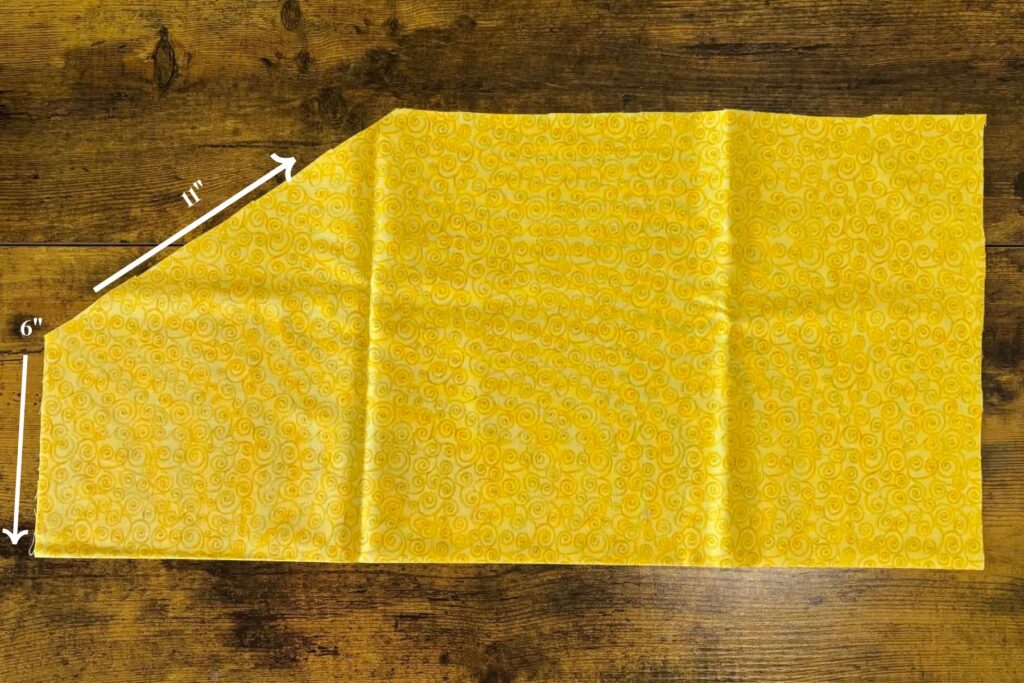
From the main fabric:
- 1 apron body piece cut on the fold: 12” wide x 25” long (adjust length as desired)
- On the top of the apron mark 6″ from the fold and 11″ down on the cut edge, draw a line between the marks and cut the fabric to make sloped sides.
From the accent fabric:
- 1 bottom ruffle: 6” tall x the width of the fabric
- 2 waist ties: 4” x 27″
- 1 neck strap: 4” x 18”
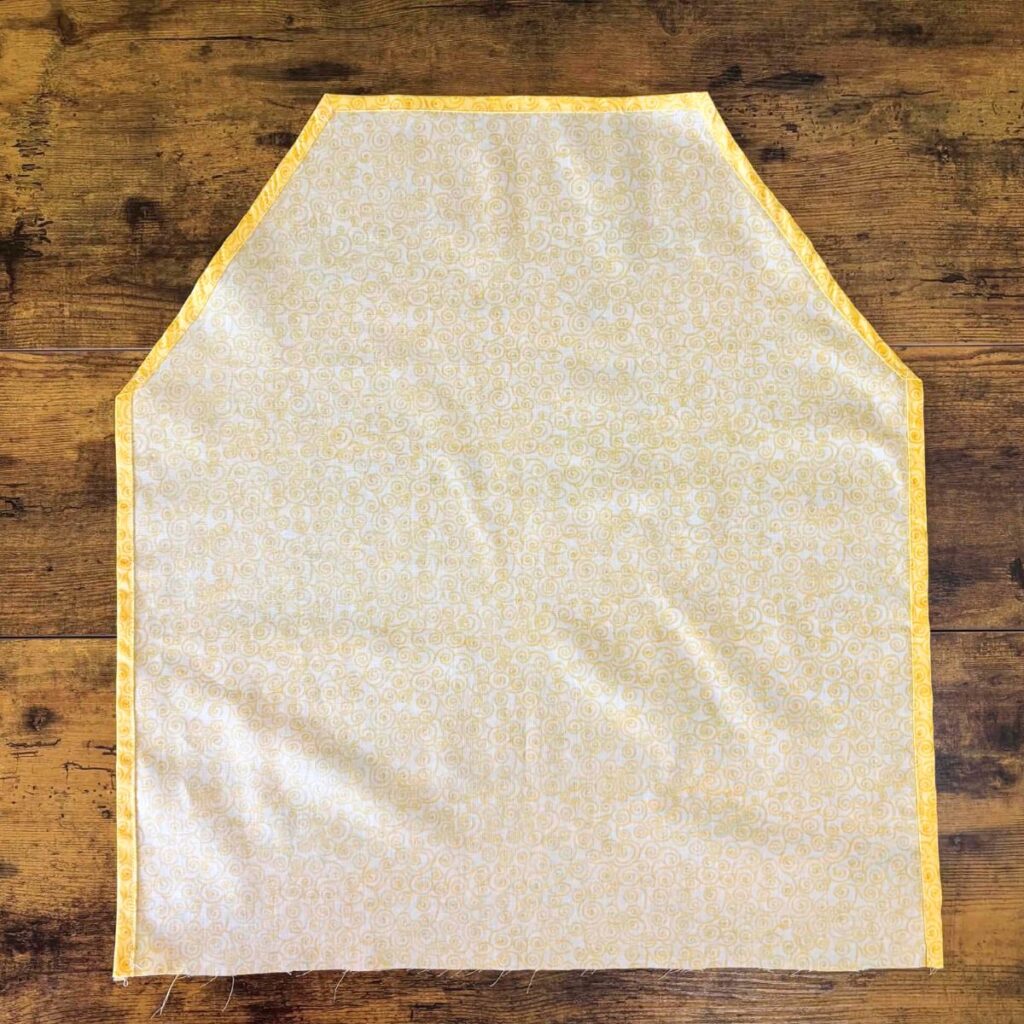
Step 1: Hem the Apron Body
- Fold edges over 1/2”, press.
- Fold again 1/2”, press.
- Stitch around the sides, top edge and side slopes.
Leave the bottom raw for now — that’s where the ruffle will go!
Step 2: Create the Ruffle
- Hem the bottom edge and sides of the ruffle strip like you did the apron body.
- Along the top edge, sew two rows of gathering stitches.
- Gently pull threads to gather until the ruffle matches the width of the apron bottom.
Even out the gathers.

Step 3: Attach the Ruffle
- With right sides together, pin the gathered edge of the ruffle to the bottom of the apron.
- Stitch in place.
- Finish seam with a zigzag stitch or serger.
- Press the seam upward.
Your apron now has that gorgeous wide contrast ruffle!

Step 4: Make the Waist Ties & Neck Strap
For each strap:
- Fold strip in half lengthwise, right sides together.
- Stitch along the long edge and one short edge.
- Turn right side out using a fabric tube turner.
- Press flat.
Step 5: Attach Straps
- Pin waist ties to each side at the top of the apron body.
- Pin neck strap to the top corners.
- Stitch securely with reinforced seams (backstitch well!).

Finishing Touches
Give everything a final press and try it on! A bright fabric paired with bold accent fabric make this apron both playful and classic. It’s perfect for baking days, craft sessions, or even gifting to a fellow sewing friend.
Optional: Add a Pocket
You could also use leftover accent fabric to create a cute pocket.
Final Thoughts
This easy ruffled apron is one of those satisfying sewing projects that looks impressive but comes together quickly. The contrast between the yellow cotton swirls and the black swirl fabric makes the wide ruffle the star of the show. Plus, it’s completely customizable — make it longer, add pockets, or even adjust the ruffle width for extra drama.
Once you make one, you’ll want to sew a whole collection in different prints!
Happy sewing 🧵✨